How to Set Up WP Ghost on WPMUDEV Hosting – Nginx Setup Guide
January 20, 2022
This tutorial has moved to the new WP Ghost Knowledge Base where each feature is presented in detail.
To set up WP Ghost on WPMUDEV hosting, configure your paths in WP Ghost, download the generated hidemywp.conf file, send it to WPMUDEV support to add to Nginx, then restore your settings and verify.
Important note: Based on user feedback, configuring full path security on WPMUDEV’s Nginx servers can require significant support coordination. If you experience difficulties with WPMUDEV support during setup, consider using WP Ghost only for securing the login path (which works without Nginx configuration changes) rather than applying it to all WordPress common paths. Alternatively, you can use WP Ghost’s full feature set on a hosting provider that gives you direct Nginx config access.
Why WPMUDEV Requires Extra Setup
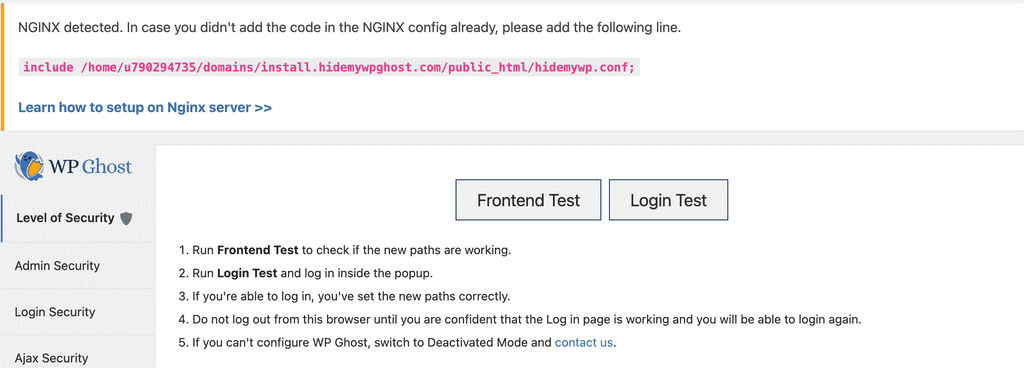
WPMUDEV hosting runs on Nginx servers. Unlike Apache-based hosts where WP Ghost writes rewrite rules directly to .htaccess, Nginx does not support .htaccess files. Instead, WP Ghost generates a configuration file called hidemywp.conf that contains all the rewrite rules your server needs to route requests to your new custom paths.
On WPMUDEV hosting, you do not have direct access to the Nginx configuration. You need to send the hidemywp.conf file to WPMUDEV support so they can add it to your server configuration and restart Nginx. This process requires a support ticket and may take some time depending on WPMUDEV’s response times.
Step-by-Step Setup on WPMUDEV
Step 1 – Configure WP Ghost and Save
1. Go to WP Ghost > Change Paths in your WordPress dashboard.
2. Select Safe Mode (recommended for WPMUDEV) or Ghost Mode (Premium).
3. Customize your paths as needed.
4. Click Save. WP Ghost generates the hidemywp.conf file with all the necessary Nginx rewrite rules.
Step 2 – Download the hidemywp.conf File
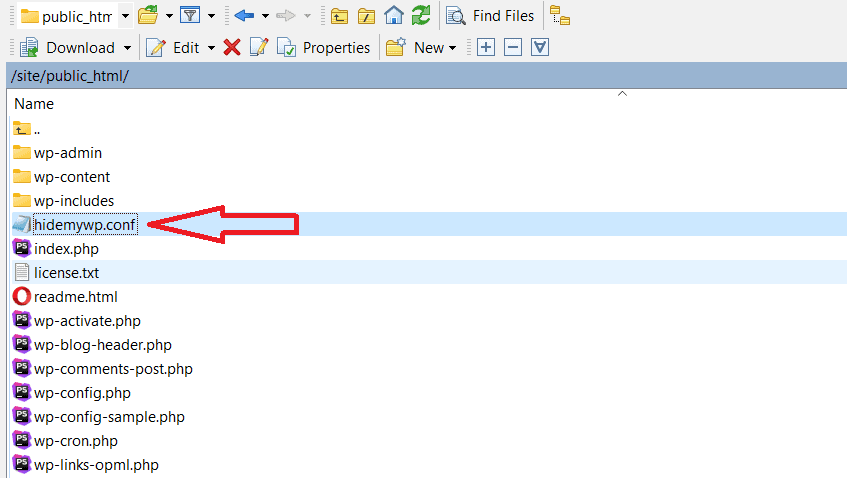
5. Go to your website’s root directory using your hosting File Manager or sFTP.
6. Download the hidemywp.conf file. This file is located in the same directory as wp-config.php.
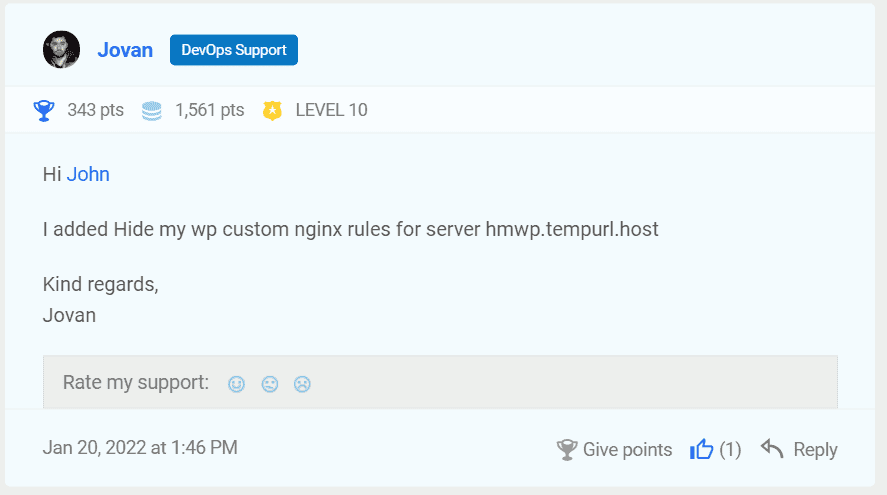
Step 3 – Send the File to WPMUDEV Support
7. Open a support ticket with WPMUDEV support.
8. Attach the hidemywp.conf file and ask them to include it in the Nginx configuration for your website and restart the Nginx server.
Step 4 – Backup Settings and Wait
9. Back up your WP Ghost settings at WP Ghost > Backup/Restore.
10. Deactivate WP Ghost until WPMUDEV support confirms the rules have been added. This prevents any access issues while the server does not yet have the rewrite rules.
Step 5 – Activate and Verify
11. Once WPMUDEV confirms the rules are active, reactivate the WP Ghost plugin.
12. Go to WP Ghost > Backup/Restore and restore your saved settings.
13. Click the Frontend Login Test to verify your new login path loads correctly.
14. Open your site in an incognito browser and confirm the old paths return 404 errors and the site loads correctly with the new paths.
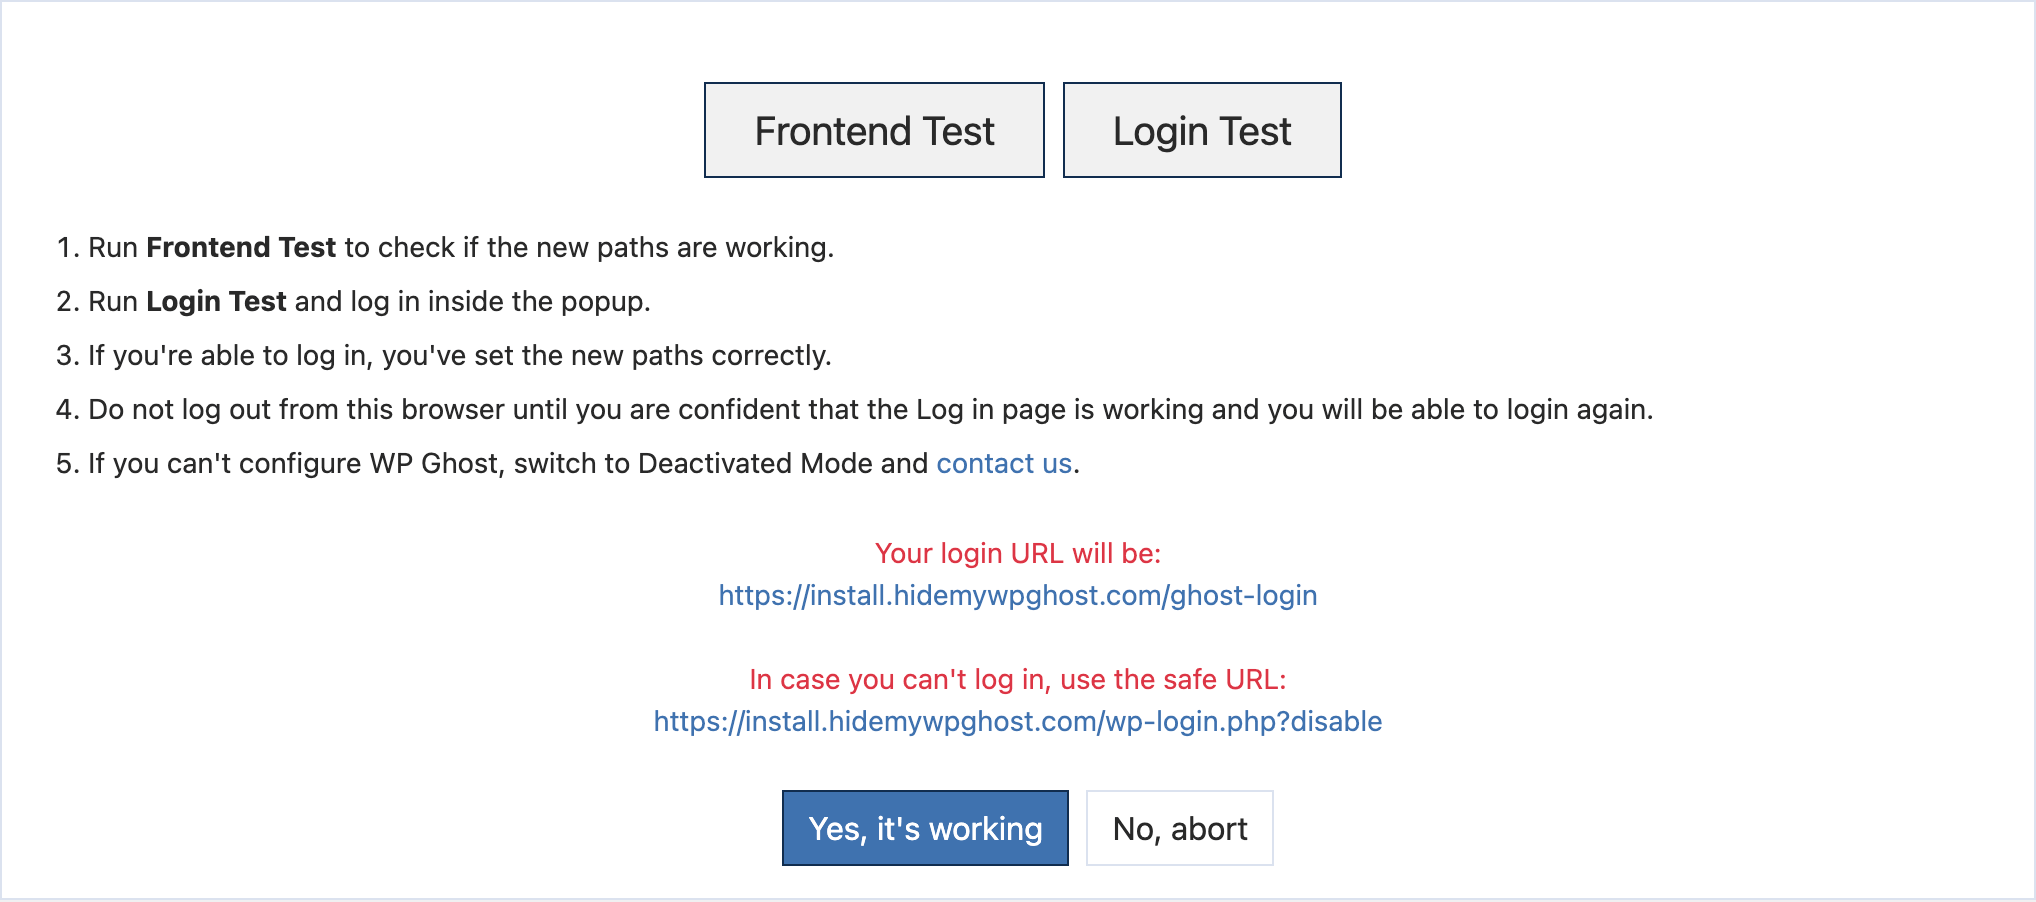
15. If everything works, click “Yes, it’s working” to confirm. If something is wrong, click “No, abort” to roll back instantly.
For more details on backing up and restoring your WP Ghost configuration, see the Backup/Restore documentation.
Alternative – Secure Only the Login Path
If coordinating with WPMUDEV support proves difficult, you can still get significant security value by using WP Ghost only for features that do not require Nginx configuration changes. The custom login path, brute force protection, two-factor authentication, security headers, and the 8G Firewall all work without Nginx rewrite rules. These features alone block the m