Brute Force Attack Protection in WP Ghost – Complete Setup Guide
This tutorial has moved to the new WP Ghost Knowledge Base where each feature is presented in detail.
Activate brute force protection in WP Ghost (formerly Hide My WP Ghost) to limit login attempts, add reCAPTCHA to login forms, protect WooCommerce, ban malicious IPs, and block automated password-guessing attacks on your WordPress site.
WordPress does not limit the number of login attempts by default. There is no lockout after 5, 50, or even 500 failed password guesses. Bots exploit this by running brute force attacks, cycling through thousands of username and password combinations until they find one that works.
According to the Melapress WordPress Security Survey, the most common security threats reported by WordPress professionals are brute force attacks, plugin vulnerabilities, and malicious code injection. And 8% of WordPress sites that get hacked are compromised through weak or stolen passwords.
WP Ghost stops brute force attacks by adding reCAPTCHA verification to your login forms, limiting the number of failed attempts before an IP gets banned, and extending protection to password reset, registration, comment, and WooCommerce login forms.
This tutorial covers every option in the WP Ghost > Brute Force panel.
What is a Brute Force Attack
How Brute Force Attacks Work
A brute force attack is a method where automated bots try different username and password combinations repeatedly until they find one that grants access. Think of it as trying every key on a keyring until one opens the door.
Attackers use automated tools and botnets that can test thousands of combinations per minute. They target the login page (wp-login.php) and the XML-RPC file, both of which accept authentication requests by default without any rate limiting.
A successful brute force attack gives hackers full access to your admin dashboard. From there, they can install malware, steal user data, redirect your traffic, inject spam, or delete your entire site.
Even an unsuccessful brute force attack causes problems. The flood of login requests consumes server resources, which can slow down your site or make it temporarily unavailable to legitimate visitors.
Which Websites Are Targeted
WordPress is the most targeted CMS on the internet, powering over 43% of all websites. According to security researchers, WordPress faces an average of 90,000 attacks per minute. Most of these are automated and indiscriminate, meaning bots attack every WordPress site they can find, not just high-value targets.
Bots typically target the login page and the xmlrpc.php file first. They start with common usernames like “admin” and run dictionary-based password lists against them. If your site uses a default username and a weak password, it can be compromised in minutes.
This is why WP Ghost combines path security (changing the login URL so bots cannot find it) with brute force protection (limiting attempts and adding CAPTCHA verification for the login forms that remain accessible).
Why Brute Force Protection Matters
| Without brute force protection | With WP Ghost brute force protection |
|---|---|
| Unlimited login attempts allowed | Login locked after configurable failed attempts |
| No CAPTCHA verification | Math reCAPTCHA, Google V2, V3, or Enterprise |
| Bots submit forms freely | Login, password reset, register, and comment forms protected |
| No IP management | Ban and whitelist IPs individually or by range |
| No visibility into attacks | Blocked IPs report with hostnames and attempt counts |
| WooCommerce login exposed | WooCommerce login forms protected automatically |
Activate Brute Force Protection
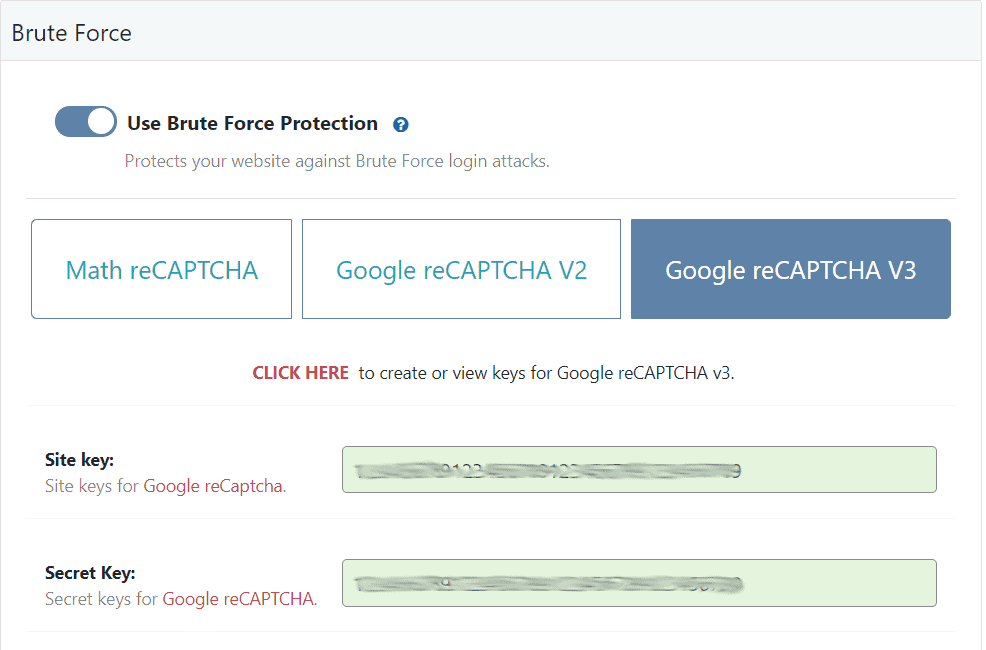
Go to WP Ghost > Brute Force > Settings and switch on Use Brute Force Protection.
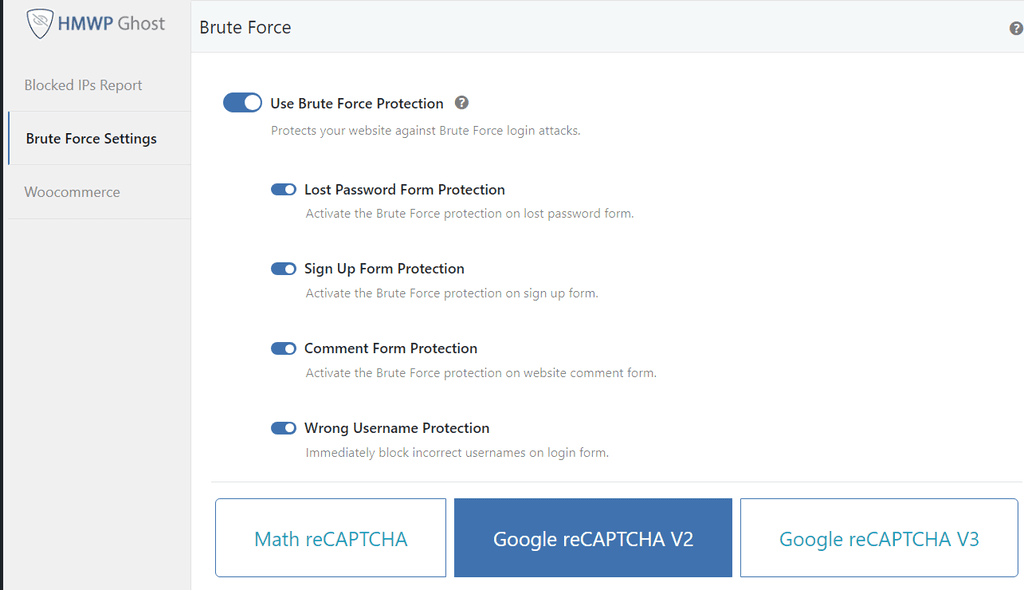

Once enabled, you will see options to select your preferred reCAPTCHA type and configure form-level protections.
Lost Password Form Protection
Adds brute force protection to the password reset form. This prevents bots from flooding your site with password reset requests and from using the reset form to confirm whether a username exists on your site.
Sign Up Form Protection
Adds protection to the registration form. This blocks automated bots from creating fake accounts on your site, which is a common attack vector for spam and phishing.
Comment Form Protection
Protects the comment section from automated spam submissions and malicious link injection through bot-submitted comments.
Wrong Username Protection
Immediately blocks or slows down login attempts when an incorrect username is entered. This stops bots from enumerating valid usernames on your site before launching targeted password attacks.
WooCommerce Protection
If WooCommerce is installed on your site, WP Ghost automatically detects it and shows WooCommerce-specific brute force options. You can activate protection for WooCommerce login forms by switching on WP Ghost > Brute Force > WooCommerce > WooCommerce Support.

reCAPTCHA Protection Options
WP Ghost offers four reCAPTCHA options to verify that login attempts come from humans, not bots. You need to enable Use Brute Force Protection first to see these options.
Math reCAPTCHA Protection
Math reCAPTCHA displays a simple math problem on the login page that users must solve before logging in. This is the easiest option to set up because it requires no external API keys.
Go to WP Ghost > Brute Force > Settings and select Math reCAPTCHA.

After selecting Math reCAPTCHA, you can customize three settings:
Max Failed Attempts – the number of times a user can fail before their IP is temporarily locked. Default: 5 attempts.

Ban Duration – how long a blocked IP stays locked out. Default: 3600 seconds (1 hour).

Lockout Message – the message shown instead of the login form when an IP is blocked. Default: “Your IP has been flagged for potential security violations. Please try again in a little while.”

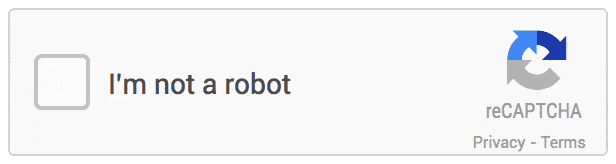
Google reCAPTCHA V2 Protection
Google reCAPTCHA V2 adds the familiar “I’m not a robot” checkbox to your login form. Google analyzes user behavior and either passes them through instantly or presents a challenge to verify they are human.
Go to WP Ghost > Brute Force > Settings and select Google reCAPTCHA V2.
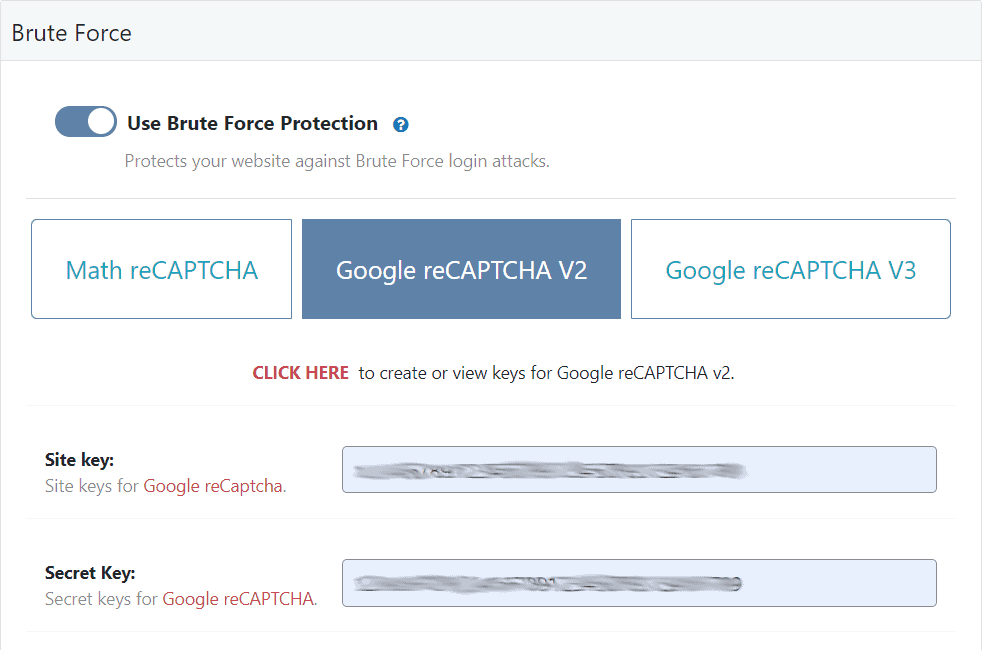
You will see the same Max Failed Attempts, Ban Duration, and Lockout Message settings available in Math reCAPTCHA. Plus, Google reCAPTCHA V2 adds two customization options: reCaptcha Theme (Light or Dark) and Language (auto-detects from your site language if unspecified).


How to Set Up Google reCAPTCHA V2
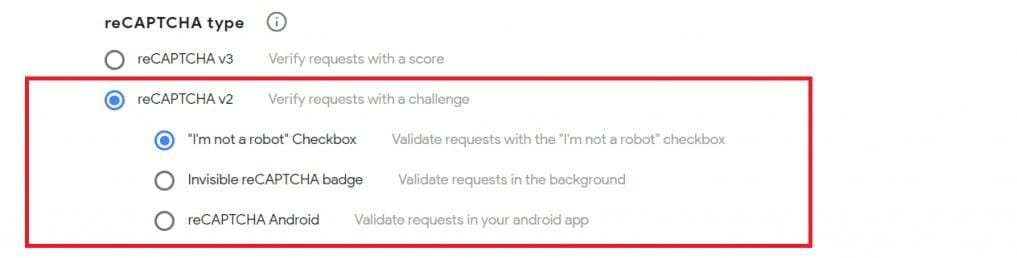
- Go to https://www.google.com/recaptcha/admin#list and click to create a new reCAPTCHA.
- Enter a Label (use something you will recognize, like your site name).
- Select reCAPTCHA v2 and choose “I’m not a robot” Checkbox.
- Enter your domain name, accept the terms, and click Submit.
- Copy the Site Key and Secret Key from the next page.
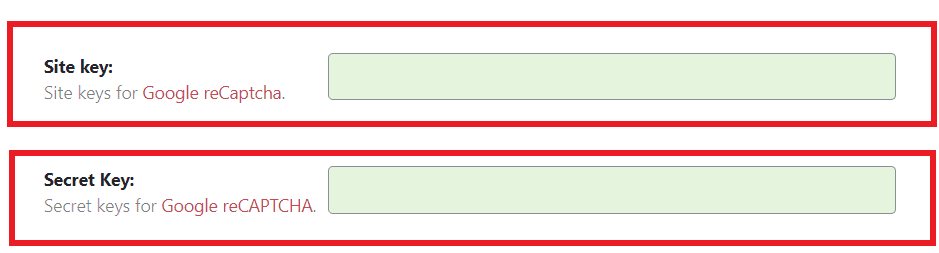
- Paste both keys into the corresponding fields in WP Ghost > Brute Force > Settings and click Save.
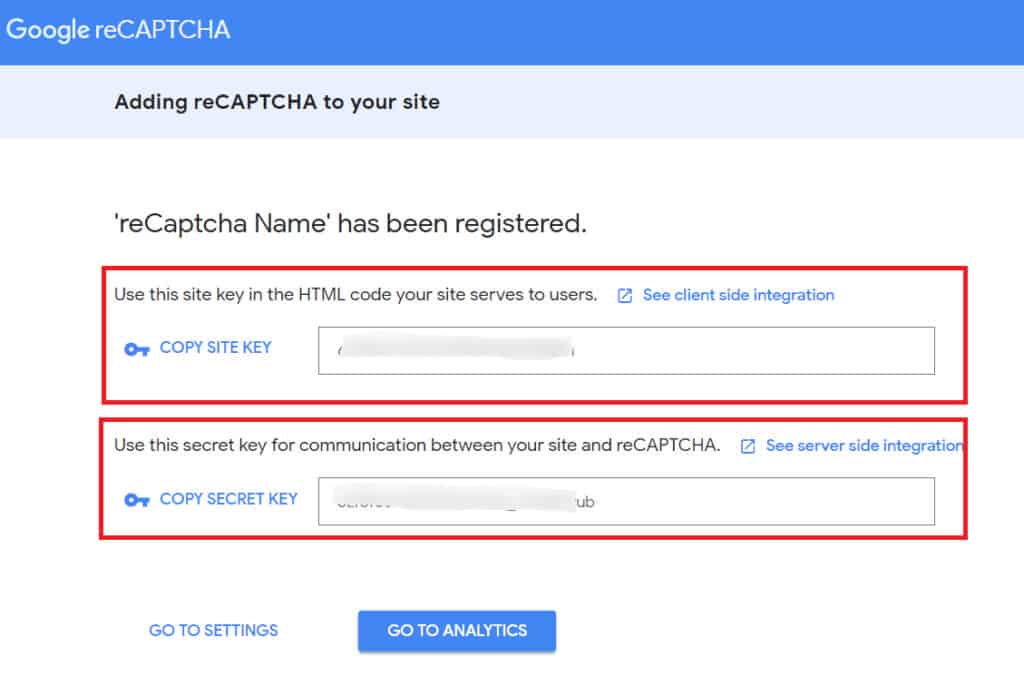
The Site Key renders the reCAPTCHA widget on your pages. The Secret Key handles server-side validation between your site and Google’s servers. Both keys are unique to your domain.
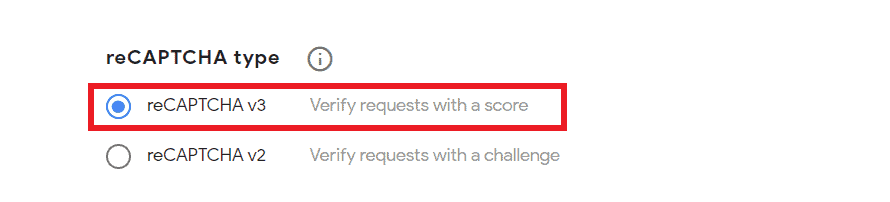
Google reCAPTCHA V3 Protection
Google reCAPTCHA V3 works differently from V2. Instead of showing a checkbox, it runs invisibly in the background and assigns a spam score to each visitor based on their behavior. There is no friction for legitimate users, as they never see a challenge.
The score (0.0 to 1.0, where 1.0 is very likely a human) is visible in your Google reCAPTCHA account. Learn more about how reCAPTCHA V3 works.
Go to WP Ghost > Brute Force > Settings and select Google reCAPTCHA V3.
How to Set Up Google reCAPTCHA V3
- Go to https://www.google.com/recaptcha/admin#list and click to create a new reCAPTCHA.
- Enter a Label for your site.
- Select reCAPTCHA v3 as the type.
- Enter your domain name, accept the terms, and click Submit.
- Copy the Site Key and Secret Key.
- Paste both keys into WP Ghost > Brute Force > Settings and click Save.

Google reCAPTCHA V3 includes the same customization options as the other types: Max Failed Attempts (default 5), Ban Duration (default 1 hour), and a customizable Lockout Message.
Google reCAPTCHA Enterprise Protection
Google reCAPTCHA Enterprise is the most advanced option, designed for high-traffic sites and businesses that need granular control over bot detection. It uses the same invisible scoring as V3 but adds enterprise-grade features like detailed analytics, custom risk thresholds, and integration with Google Cloud security services.
Go to WP Ghost > Brute Force > Settings and select Google reCAPTCHA Enterprise.
Setting up Enterprise requires a few extra steps compared to V2 and V3:
- Go to the Google Cloud reCAPTCHA Enterprise console and create a new Enterprise key.
- Copy the Site Key ID and paste it into the Site Key field in WP Ghost.
- Copy your Google Cloud Project ID and paste it into the Project ID field.
- Create a Google Cloud API Key from https://console.cloud.google.com/apis/credentials and paste it into the API Key field.
Enterprise includes the same Max Failed Attempts, Ban Duration, and Lockout Message options as all other reCAPTCHA types.
IP Management
IP whitelisting and blacklisting are managed from the Firewall panel in the current version of WP Ghost. This gives you centralized control over all IP-based access rules across both brute force protection and firewall features.
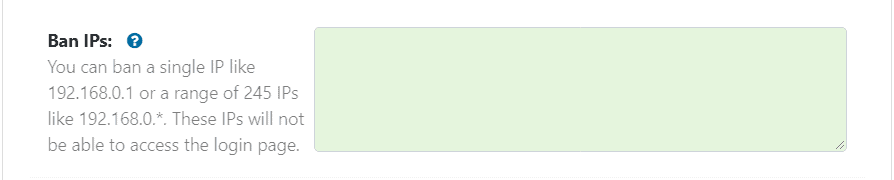
Ban IP Addresses
You can permanently ban specific IP addresses from accessing your site. This is useful when you see the same IPs appearing repeatedly in your security logs or blocked IPs list.
Go to WP Ghost > Firewall > Blacklist and add IPs to the blacklist. You can enter individual IPs or IP ranges using wildcards: 192.168.0.*, 192.168.*.*, or 192.*.*.* to block an entire class. You can also block by User Agent, Referrer, and Hostname from this same panel.
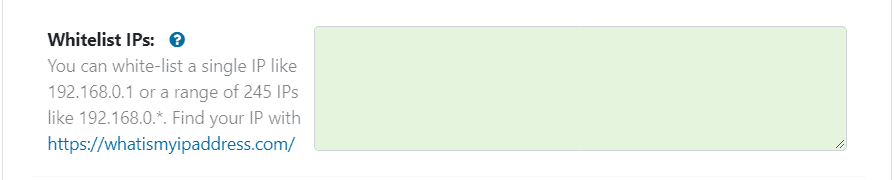
Whitelist IP Addresses
If you have a static IP address, add it to the whitelist so your own IP is never blocked by brute force protection, the firewall, automated IP blocking, or country blocking. This is especially important for teams where several people share the same office network.
Go to WP Ghost > Firewall > Whitelist and add your IPs. You can use the same wildcard format: 192.168.0.*, 192.168.*.*, or 192.*.*.* for IP ranges. You can also choose from three whitelist levels that control how much access whitelisted IPs receive.
Blocked IPs Report
IPs that get blocked by brute force protection appear in the Blocked IPs list. For each blocked IP, WP Ghost shows the IP address, the number of failed login attempts, and the hostname.
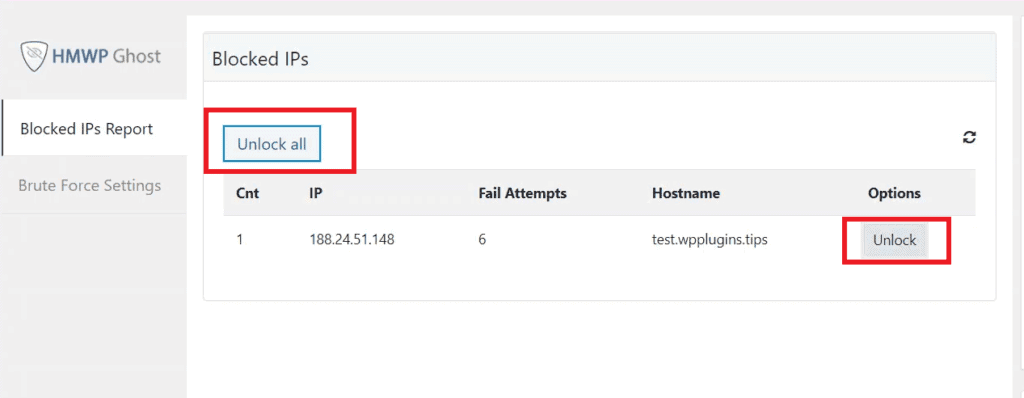
You can unlock all blocked IPs at once using the Unlock ALL button, or unlock individual IPs using the Unlock button in the Options column. For a complete view of all security threats including blocked IPs, see the Security Threats Log (Premium).
Translation Tip
If you use WPML or Polylang for multilingual sites, you can translate custom brute force texts (like the lockout message or Magic Login button label) from your translation plugin’s string translation panel. Changes apply automatically based on the visitor’s active language.
Brute Force Shortcode
If you use a page builder like Elementor or Divi to create custom login forms, WP Ghost may not automatically load brute force protection on those pages. The [ hmwp_bruteforce ] shortcode lets you add brute force protection to any custom login form.
To use it in Elementor, add a Login widget to your page, then add a shortcode field within the form and paste [ hmwp_bruteforce ] (without the spaces inside the brackets). The shortcode supports both Math reCAPTCHA and Google reCAPTCHA options.
For a full walkthrough with screenshots, see the Integrating Brute Force Protection in Elementor Login Forms article.
Related Tutorials
Continue strengthening your WordPress security with these guides:
Getting Started with WP Ghost – install, activate, and choose your security level.
Customize All WordPress Paths – change every WordPress path including the login path.
Change WordPress Login Path – make your login URL invisible to bots.
Two-Factor Authentication – add 2FA with code, email, or passkeys for the strongest login security.
Magic Link Login – passwordless login for administrators and team members.
Firewall and Geo Security – block entire countries and enable the 8G Firewall.
Disable XML-RPC Access – block the other major brute force attack vector.
Security Monitor – set up email alerts for brute force events and suspicious activity.
Website Security Check – run a complete security audit with one-click fixes.