How to Set up Whitelabel in Hide My WP Ghost
October 20, 2021
![]()
This tutorial has moved to the new WP Ghost Knowledge Base where each feature is presented in detail.
- What Is White Label in WP Ghost
- White Label Requirements
- How to Access the White Label Panel
- What You Can Customize
- How to Install the White-Labeled Plugin on a Client Site
- Managing Client Sites from the Cloud Dashboard
- White Label List
- Frequently Asked Questions
- What happens if a client deactivates the plugin?
- Can clients see that it is WP Ghost under the hood?
- Do white-labeled installations get automatic updates?
- Can I create different white label configurations for different clients?
- Do I need to create my own knowledge base website?
- Does WP Ghost modify WordPress core files?
WP Ghost can be fully white-labeled to appear under your agency’s brand name, logo, and menu icon. Customize everything from the WP Ghost Cloud dashboard, download the branded ZIP file, and install it on client sites.
What Is White Label in WP Ghost
White Label lets you rebrand WP Ghost completely so it appears as your own proprietary security plugin. Your clients see your brand name in the WordPress Plugins list, your logo in the plugin settings, your custom menu name in the sidebar, and your website URL in all help links. There is no visible trace of WP Ghost branding anywhere on their site.
This is designed for agencies and freelancers who manage multiple WordPress sites and want to offer clients a premium security plugin under their own brand. You configure the white label once in the WP Ghost Cloud dashboard, download the customized plugin ZIP, and install it on as many client sites as your license allows.
White Label Requirements
The plugin must remain active on the client’s site. White labeling works through the WP Ghost Cloud API. When the plugin is active, it checks the license and applies your custom branding. If a client deactivates the plugin, the branding reverts to the default WP Ghost name. This does not affect any other sites under your account.
If you want to prevent clients from deactivating the plugin, you have two options. You can use CSS to hide the plugin from the WordPress Plugins list (the plugin still runs but clients can not see the deactivate button). Or you can use the Admin Menu Editor plugin to hide the entire Plugins section from certain user roles.
Important: If any single client finds a way to deactivate the plugin, it does not affect your other installations. Every other site under your account remains white-labeled and continues receiving updates. Only the deactivated site reverts to the default WP Ghost branding.
How to Access the White Label Panel
The White Label customization panel is available in the WP Ghost Cloud dashboard. Your account must meet the license requirements for the White Label option to appear.
1. Log into your WP Ghost Cloud account at account.hidemywpghost.com.
2. Look for the Customize White Label button. It appears automatically if your account qualifies.

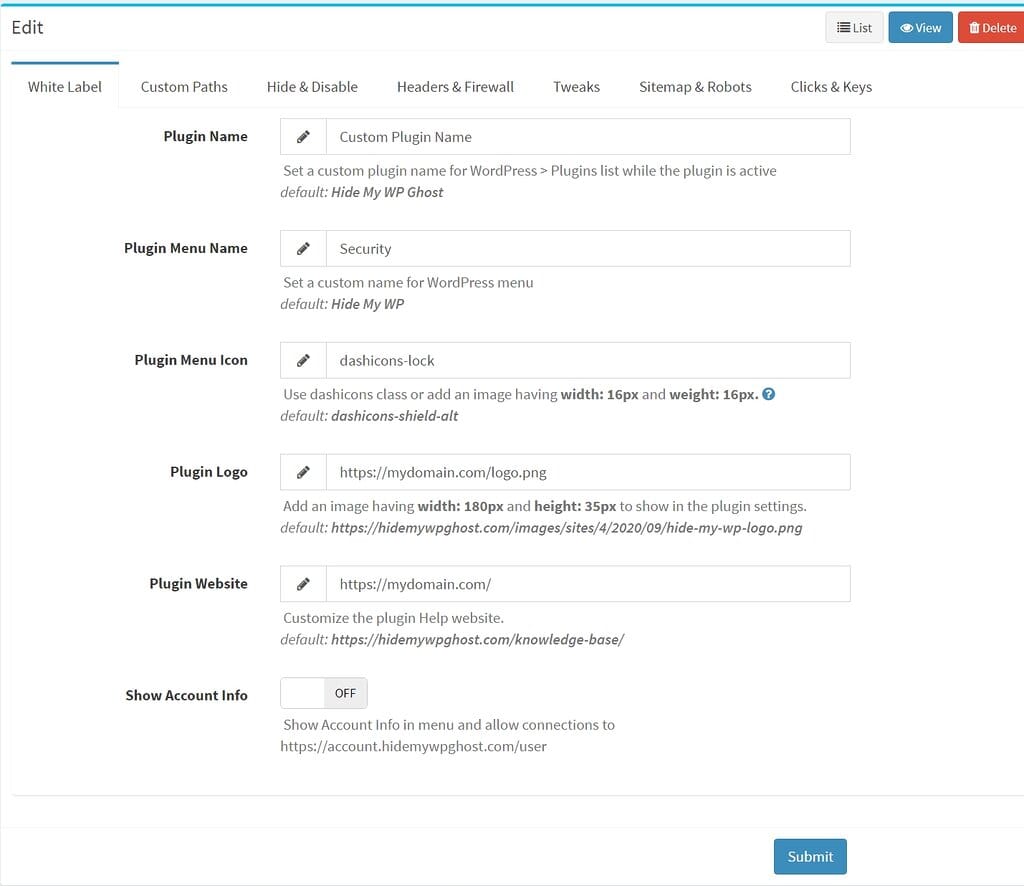
What You Can Customize
The White Label panel gives you full control over every visible element of the plugin. Here is what each setting does.
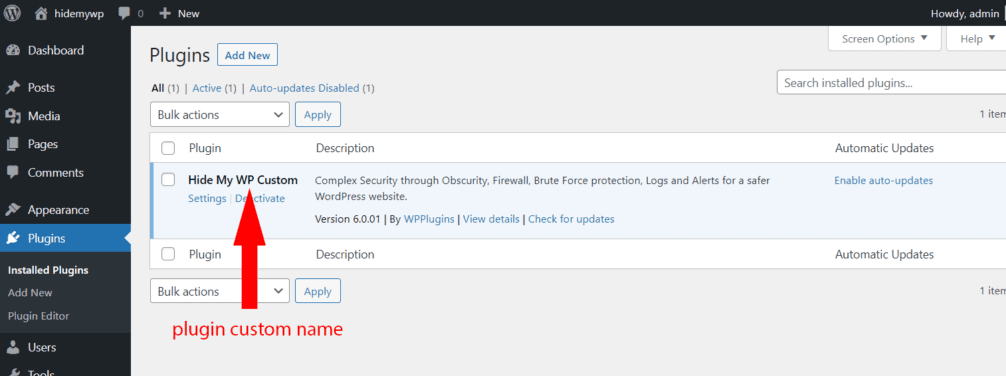
Plugin Name
Set a custom name that appears in the WordPress > Plugins list instead of “WP Ghost.” The “By” author link also changes to point to your domain instead of the WP Ghost website.
For example, if you set the plugin name to “Shield Pro” and the domain to youragency.com, clients see “Shield Pro” in their Plugins list. Clicking the author link takes them to youragency.com, not wpghost.com.


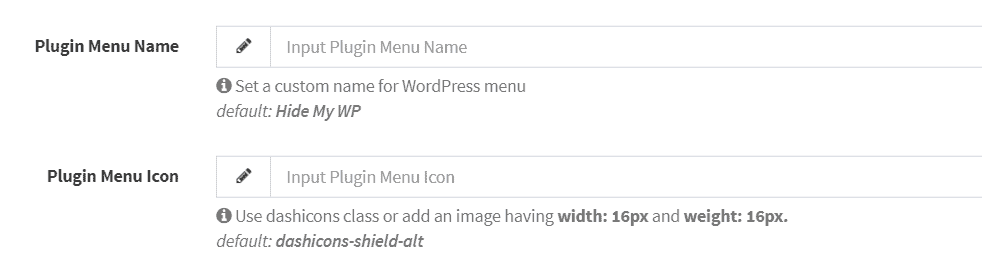
Plugin Menu Icon and Menu Name
Change the name and icon that appear in the WordPress admin sidebar menu. You can upload a custom icon image or use any WordPress Dashicons class name.

Plugin Logo
Replace the default WP Ghost logo that appears inside the plugin settings pages with your own logo. For the best look, use an image that is 180px wide and 35px tall. The image must be hosted on your website. Just enter the image URL in the Plugin Logo field.

Plugin Website (Optional)
If you want all help links inside the plugin to point to your own website instead of the WP Ghost knowledge base, enter your domain here. All internal links will redirect from wpghost.com/kb/ paths to yourdomain.com/kb/ paths.
This means your website needs to have corresponding pages at the same URL paths. For example, if WP Ghost links to /kb/customize-paths-in-hide-my-wp-ghost/, your site needs a page at the same path. You will need to create your own original content for these pages, as WP Ghost’s knowledge base content is copyright-protected.

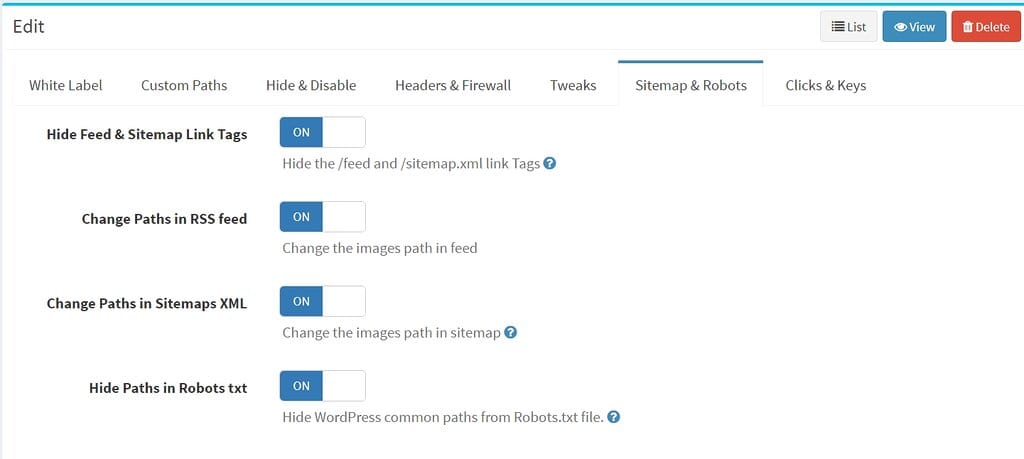
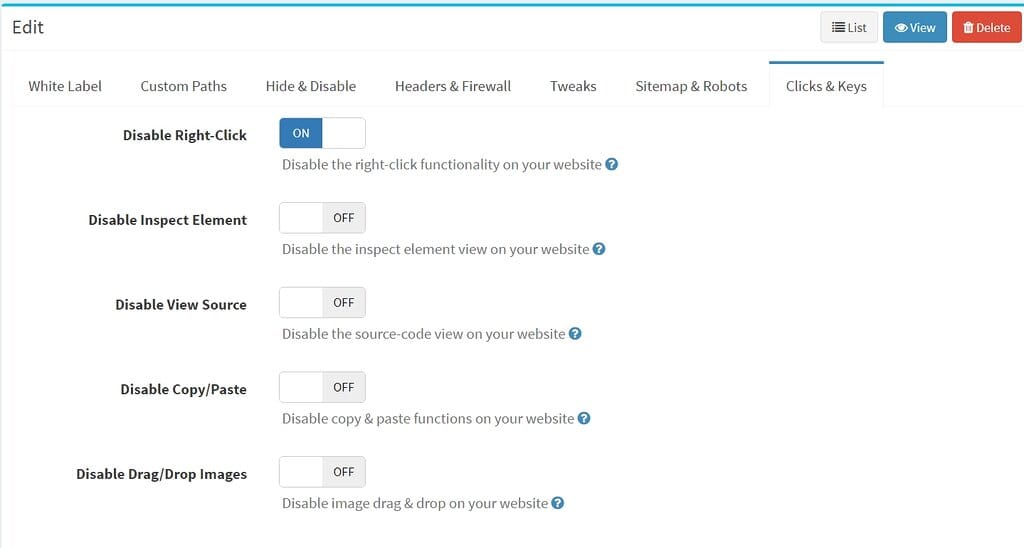
Deep Settings – Preconfigure All Features
Setting up WP Ghost individually on every client site is time-consuming. Deep Settings lets you preconfigure every plugin feature once in the White Label panel. When you install the customized ZIP on a client site, all your chosen settings are applied automatically.
You can preconfigure path security settings, firewall level, brute force protection options, 2FA settings, security headers, text mapping, and every other WP Ghost feature. This ensures all your client sites start with the same security baseline without manual configuration.
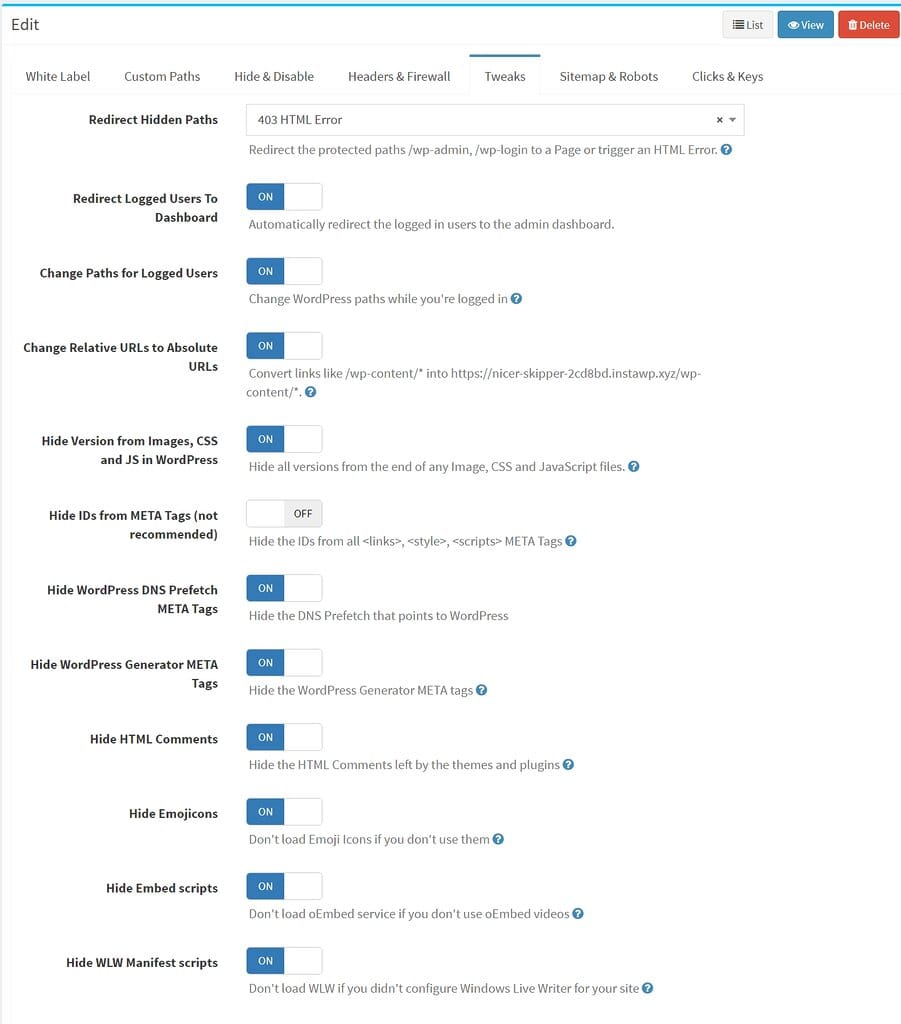
For a full reference of every feature and what it does, see the WP Ghost Tutorial.
How to Install the White-Labeled Plugin on a Client Site
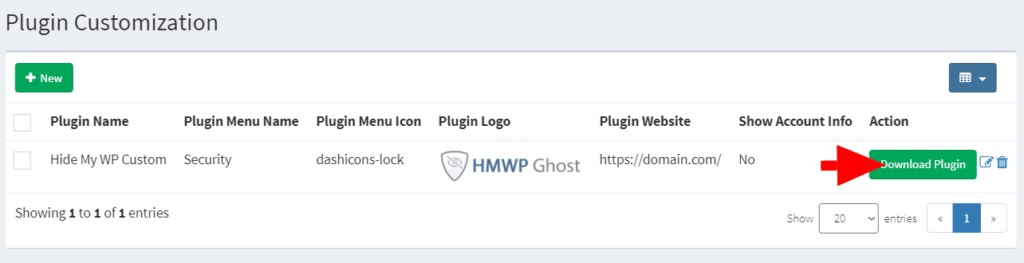
After you finish configuring the White Label options, download the customized plugin and install it on your client’s site.
1. In the White Label panel, click Download Plugin to get the customized ZIP file.
2. Log into your client’s WordPress dashboard as an administrator.
3. Go to Plugins > Add New > Upload Plugin.
4. Upload the hide-my-wp.zip file you downloaded.
5. Click Activate. The plugin automatically appears under your custom brand name with your logo and menu icon.
6. If you preconfigured Deep Settings, all your security settings are applied automatically. If not, configure the plugin manually through Your Custom Menu Name > Change Paths.
Managing Client Sites from the Cloud Dashboard
The WP Ghost Cloud dashboard at account.hidemywpghost.com gives you a central place to manage all client installations.
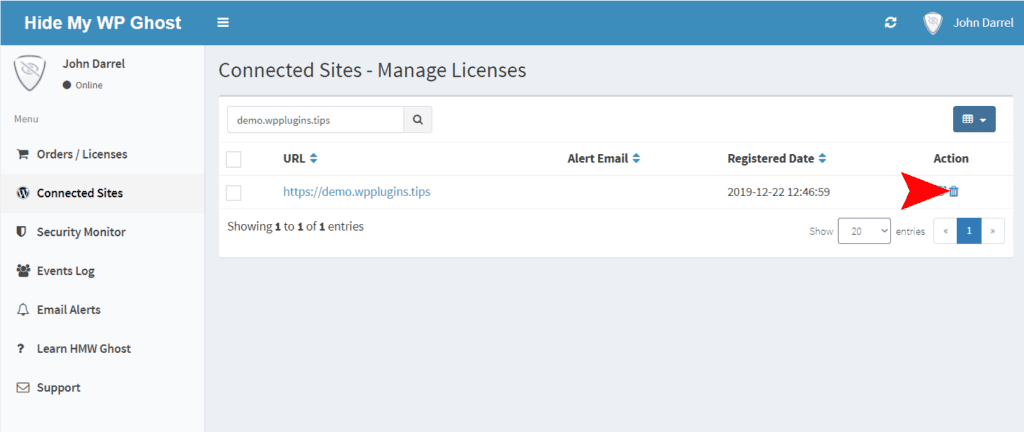
Go to Cloud Account > Connected Sites to see every site running under your license. From here you can monitor which sites are active, check their security status, and deactivate access for specific sites.
If a client stops working with your agency, delete their website from the Connected Sites list. This deactivates their license immediately. The plugin on their site will prompt them to reconnect, and since they do not have your license credentials, they can not reactivate. The white label branding reverts to the default WP Ghost name.
White Label List
The White Label List in your Cloud dashboard shows all the customized plugin configurations you have created. Each entry shows the brand name, settings, and a Download Plugin button so you can re-download any configuration at any time.
This is useful when you manage different branding for different client groups or when you need to update a customized version after a new WP Ghost release.

Frequently Asked Questions
What happens if a client deactivates the plugin?
Only that specific site is affected. The plugin reverts to the default WP Ghost branding on that site only. All your other installations remain white-labeled and continue receiving updates. No other client is impacted.
Can clients see that it is WP Ghost under the hood?
Not while the plugin is active and white-labeled. The plugin name, author link, menu name, menu icon, logo, and all help links are replaced with your branding. The plugin folder on the server is still named “hide-my-wp,” but clients who do not have FTP access will not see this.
Do white-labeled installations get automatic updates?
Yes. White-labeled installations connect to the WP Ghost update server through the API. When a new version is released, clients receive the update notification in their WordPress dashboard. The update installs automatically with your white label branding preserved.
Can I create different white label configurations for different clients?
Yes. You can create multiple White Label configurations in the Cloud dashboard, each with different branding, logos, and preconfigured settings. The White Label List keeps track of all your configurations, and you can download any of them at any time.
Do I need to create my own knowledge base website?
Only if you set a custom Plugin Website URL. If you leave the Plugin Website field empty, help links inside the plugin will point to the default WP Ghost knowledge base. If you enter your own domain, you will need to create corresponding pages at matching URL paths with your own original content.
Does WP Ghost modify WordPress core files?
No. WP Ghost uses server rewrite rules and WordPress hooks. No core files are moved, renamed, or modified. Deactivating the plugin restores all default paths instantly. The white label branding is applied through the API and WordPress filters, not by modifying plugin files on disk.