WP Ghost User Events Log – Track WordPress Dashboard Activity
This tutorial has moved to the new WP Ghost Knowledge Base where each feature is presented in detail.
Track every security-relevant action on your WordPress site with WP Ghost’s (formerly Hide My WP Ghost) User Events Log. Monitor logins, plugin changes, post deletions, theme updates, and failed login attempts. Set up email alerts for critical events. This is a Premium feature.
When multiple people have access to your WordPress dashboard, you need to know who did what, when, and from where. A developer deactivates a plugin. An editor deletes a post. A subscriber’s account logs in from an unfamiliar IP address. Without an activity log, these events happen silently.
WP Ghost’s User Events Log monitors logged-in user activity 24/7 and records every security-relevant action. Logs are stored locally in your WordPress database with configurable retention. You can optionally sync them to the WP Ghost Cloud Dashboard for 30-day access from any device, even if someone deletes the plugin from your site. Set up email alerts for critical events like logins from new IPs or plugin deletions to respond within minutes.
This tutorial covers the full logging system: activation, user role filtering, reading the events report, cloud storage, email alerts, and GDPR compliance.
Why Track User Activity
Monitoring user activity is essential for your hack prevention strategy, especially on sites with multiple users, freelancers, or client access.
| Without events logging | With WP Ghost User Events Log |
|---|---|
| No record of who changed what | Every action tracked with user, IP, and timestamp |
| Compromised accounts go undetected | Unusual activity visible immediately |
| Failed login attempts are invisible | Login patterns tracked by user and IP |
| Local logs lost if site is hacked | Cloud copy preserved for 30 days |
| No real-time notifications | Email alerts for critical events |
How to Activate the User Events Log
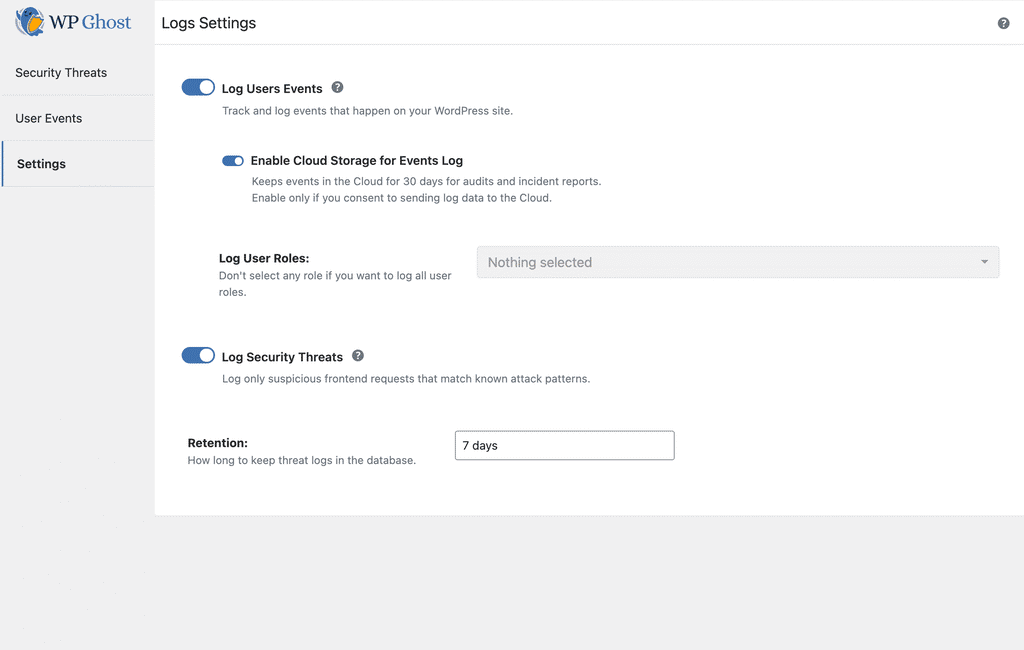
Go to WP Ghost > Logs > Settings. Switch on Log Users Events to start monitoring.
Optional: switch on Enable Cloud Storage for Events Log to sync a copy to your WP Ghost Dashboard, where logs are retained for 30 days. Cloud storage is required for email alerts.
Click Save to apply.
Log User Roles
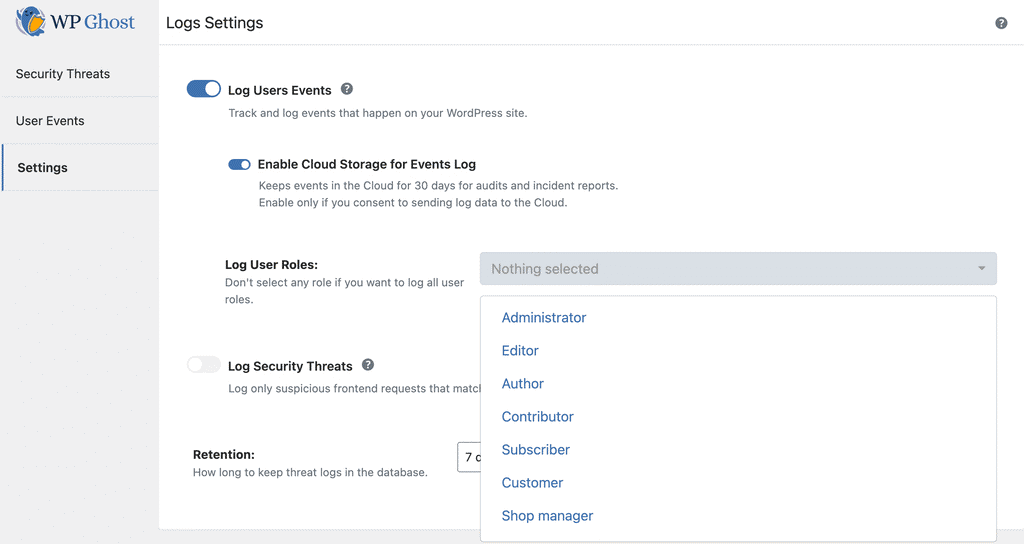
Choose which user roles WP Ghost should monitor. Select specific roles from the Log User Roles dropdown. Hold Control/Command to select multiple roles. For example, you can monitor Subscribers and Contributors but skip Administrators.
If you want WP Ghost to monitor all user roles, leave the dropdown empty (“Nothing Selected”).
What Gets Logged
The Events Log records security-relevant dashboard activity for the user roles you selected. It does not log everyday frontend actions like clicking menus or browsing pages. Every entry captures what happened and who did it:
Login activity – successful logins, failed login attempts, login IP addresses, and which IPs target your login page.
Content changes – post and page deletions (who deleted what), attachment uploads and deletions.
Plugin and theme activity – plugin activations, deactivations, and deletions. Theme and plugin updates. Core file updates.
Settings changes – any dashboard settings modifications that could affect security.
For every recorded action, WP Ghost shows the IP address and location, the action details (path, username, role, plugin/theme name), and the date and time.
Reading the Events Log Report
View events at WP Ghost > Logs > User Events.
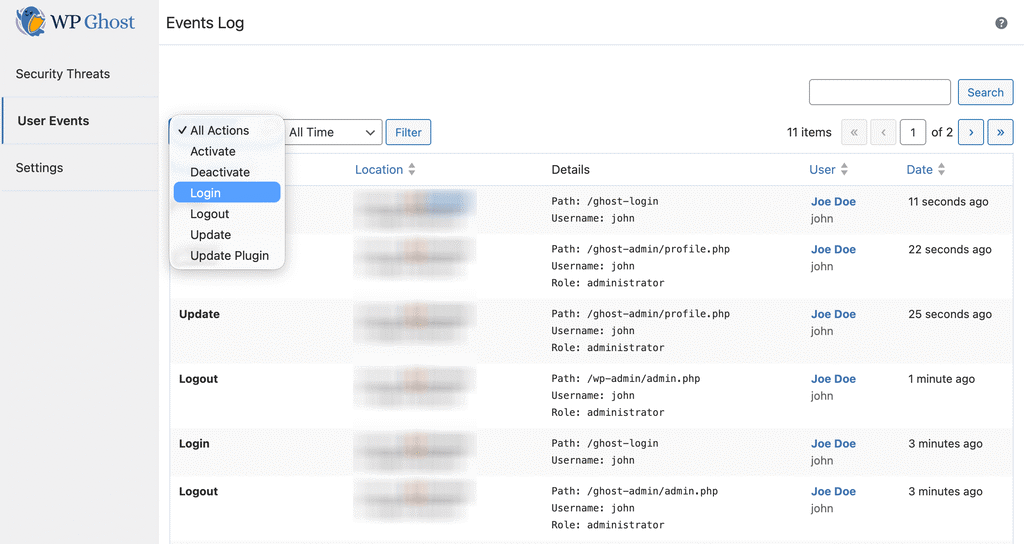
Use the Filter button to narrow results by event type: login, incorrect password, update plugin, delete plugin, delete post, and more.
Use the Search form to find entries by keyword, username, path, or IP address. For example, search for “login” to see all login-related events.
Search tip: For best results, make sure no filter is applied when using the Search function. Filters and search can conflict if used simultaneously.
Cloud Storage and WP Ghost Dashboard
When Enable Cloud Storage for Events Log is active, WP Ghost syncs events to the WP Ghost Dashboard. Cloud logs are retained for 30 days and then permanently deleted.
The advantage of cloud storage is tamper-proofing. If your site is compromised and local data is modified or deleted, the cloud copy preserves the activity log for investigation. Cloud logs remain accessible even if someone deactivates and deletes the plugin from your site.
To access the cloud report, go to WP Ghost > Logs > User Events and click Go to Events Log Panel. You will be redirected to your WP Ghost Dashboard.

The Dashboard shows the same details as the local report: website URL, location, action details, and date. Times are displayed in UTC. You can filter by ID, URL, IP address, action type, and date range. Use the Export button to download a copy before the 30-day retention expires.
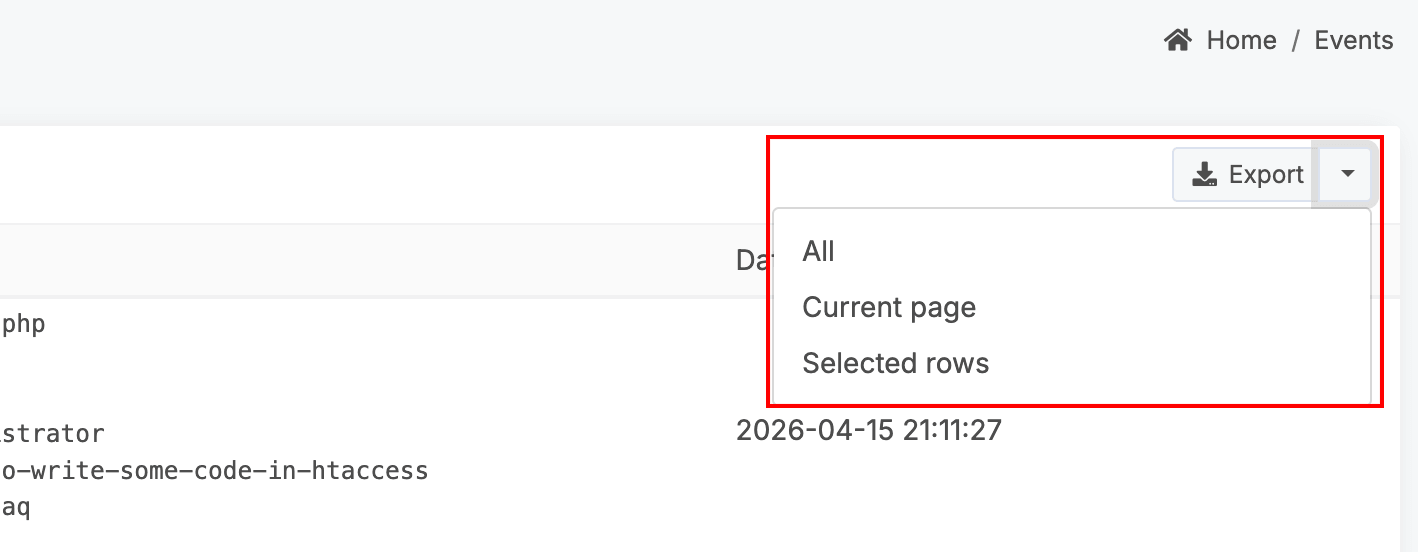
Export tip: If you apply filters before exporting, the export file will contain only the filtered entries.
Email Alerts
Get notified instantly when critical actions happen on your site. Email alerts are configured in the WP Ghost Dashboard and require Cloud Storage to be enabled.
Available alert types:
Login from different IPs – notifies you when the same user logs in from multiple IP addresses, which may indicate a compromised account.
Brute Force IP block – notifies you when WP Ghost’s Brute Force Protection blocks an IP. Requires Brute Force Protection to be active.
Too many failed logins – notifies you when a user exceeds 5 failed login attempts. Works independently of Brute Force Protection.
Plugin deleted – notifies you when any plugin is deleted from the site.
Post deleted – notifies you when any post is deleted from the site.
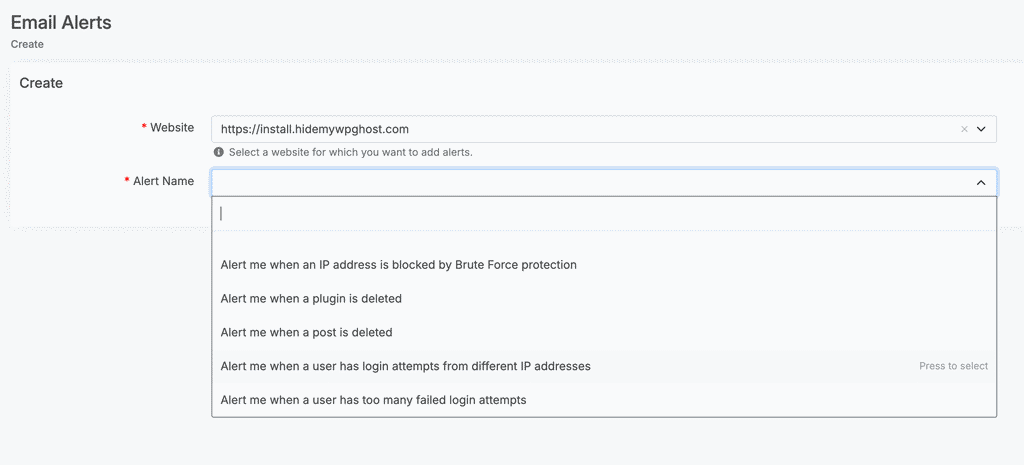
Create a New Email Alert
Go to your WP Ghost Dashboard > Email Alerts and click +New. Select the website, select the alert type, and click Submit. Each alert is set up individually.
To delete an alert, click the delete icon next to it in the Email Alerts panel.
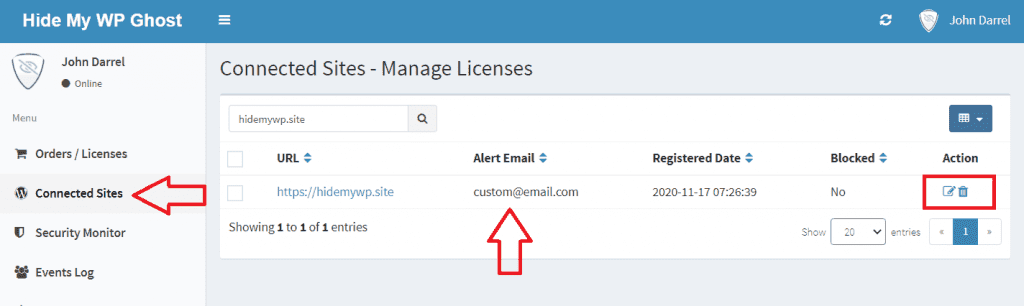
Custom Email Address per Site
By default, all alerts go to your WP Ghost account notification email (set in Profile > Settings). You can set a different email address for each connected site in Connected Sites > edit icon > custom email. Per-site settings override the default.
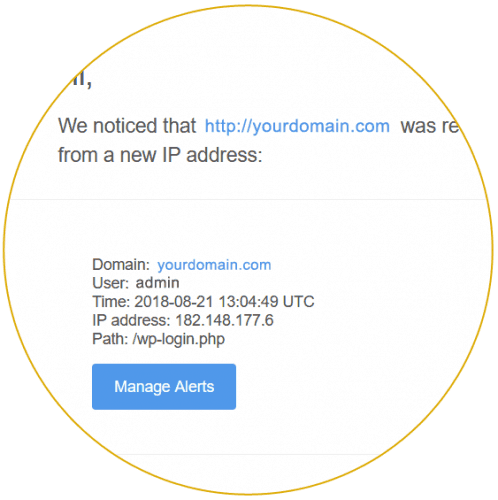
Example Email Alert
Here is an example of how an email alert looks when triggered:
Frequently Asked Questions
Is this a Premium feature?
Yes. The User Events Log is available in WP Ghost Premium. The free version includes path hiding, firewall, and brute force protection but not event logging.
Is this the same as the Security Threats Log?
No. The User Events Log tracks internal activity from logged-in users (edits, logins, settings changes). The Security Threats Log tracks external threats from bots and attackers (blocked attacks, firewall hits, brute force attempts). They are complementary: threats show what is attacking you, events show what is happening inside.
Does this log frontend user activity?
No. The Events Log only tracks security-relevant dashboard actions: logins, plugin changes, post deletions, settings modifications, and similar administrative events. It does not log everyday frontend browsing like clicking menus, viewing pages, or adding items to a WooCommerce cart.
Does this work with WooCommerce?
Yes. The Events Log tracks WooCommerce admin actions like product changes, order modifications, and plugin updates the same way it tracks regular dashboard activity. WP Ghost is fully compatible with WooCommerce.
Does WP Ghost modify WordPress core files?
No. Event logging uses WP Ghost’s own database table and WordPress hooks. No core files are modified. Disabling the feature stops logging instantly.
Related Tutorials
Use the Events Log alongside these security features:
Security Threats Log – monitor blocked external attacks (the companion to the Events Log).
Brute Force Attack Protection – block login attacks that generate events log entries.
Two-Factor Authentication – add a second verification step to complement login monitoring.
Temporary Logins – give developers time-limited access that the Events Log can track.
Firewall and Geo Security – block malicious requests before they reach WordPress.
Website Security Check – run a complete security audit.