Lesson 2 – How to Activate Brute Force Protection in WP Ghost
November 17, 2018
This tutorial has moved to the new WP Ghost Knowledge Base where each feature is presented in detail.
WP Ghost (formerly Hide My WP Ghost) includes brute force protection for login, registration, lost password, comment, and WooCommerce forms. Choose Math reCAPTCHA (free), Google reCAPTCHA V2, or Google reCAPTCHA V3. Configure failed attempt limits, ban duration, lockout message, and IP whitelist/blacklist. All reCAPTCHA types are available in the free version.
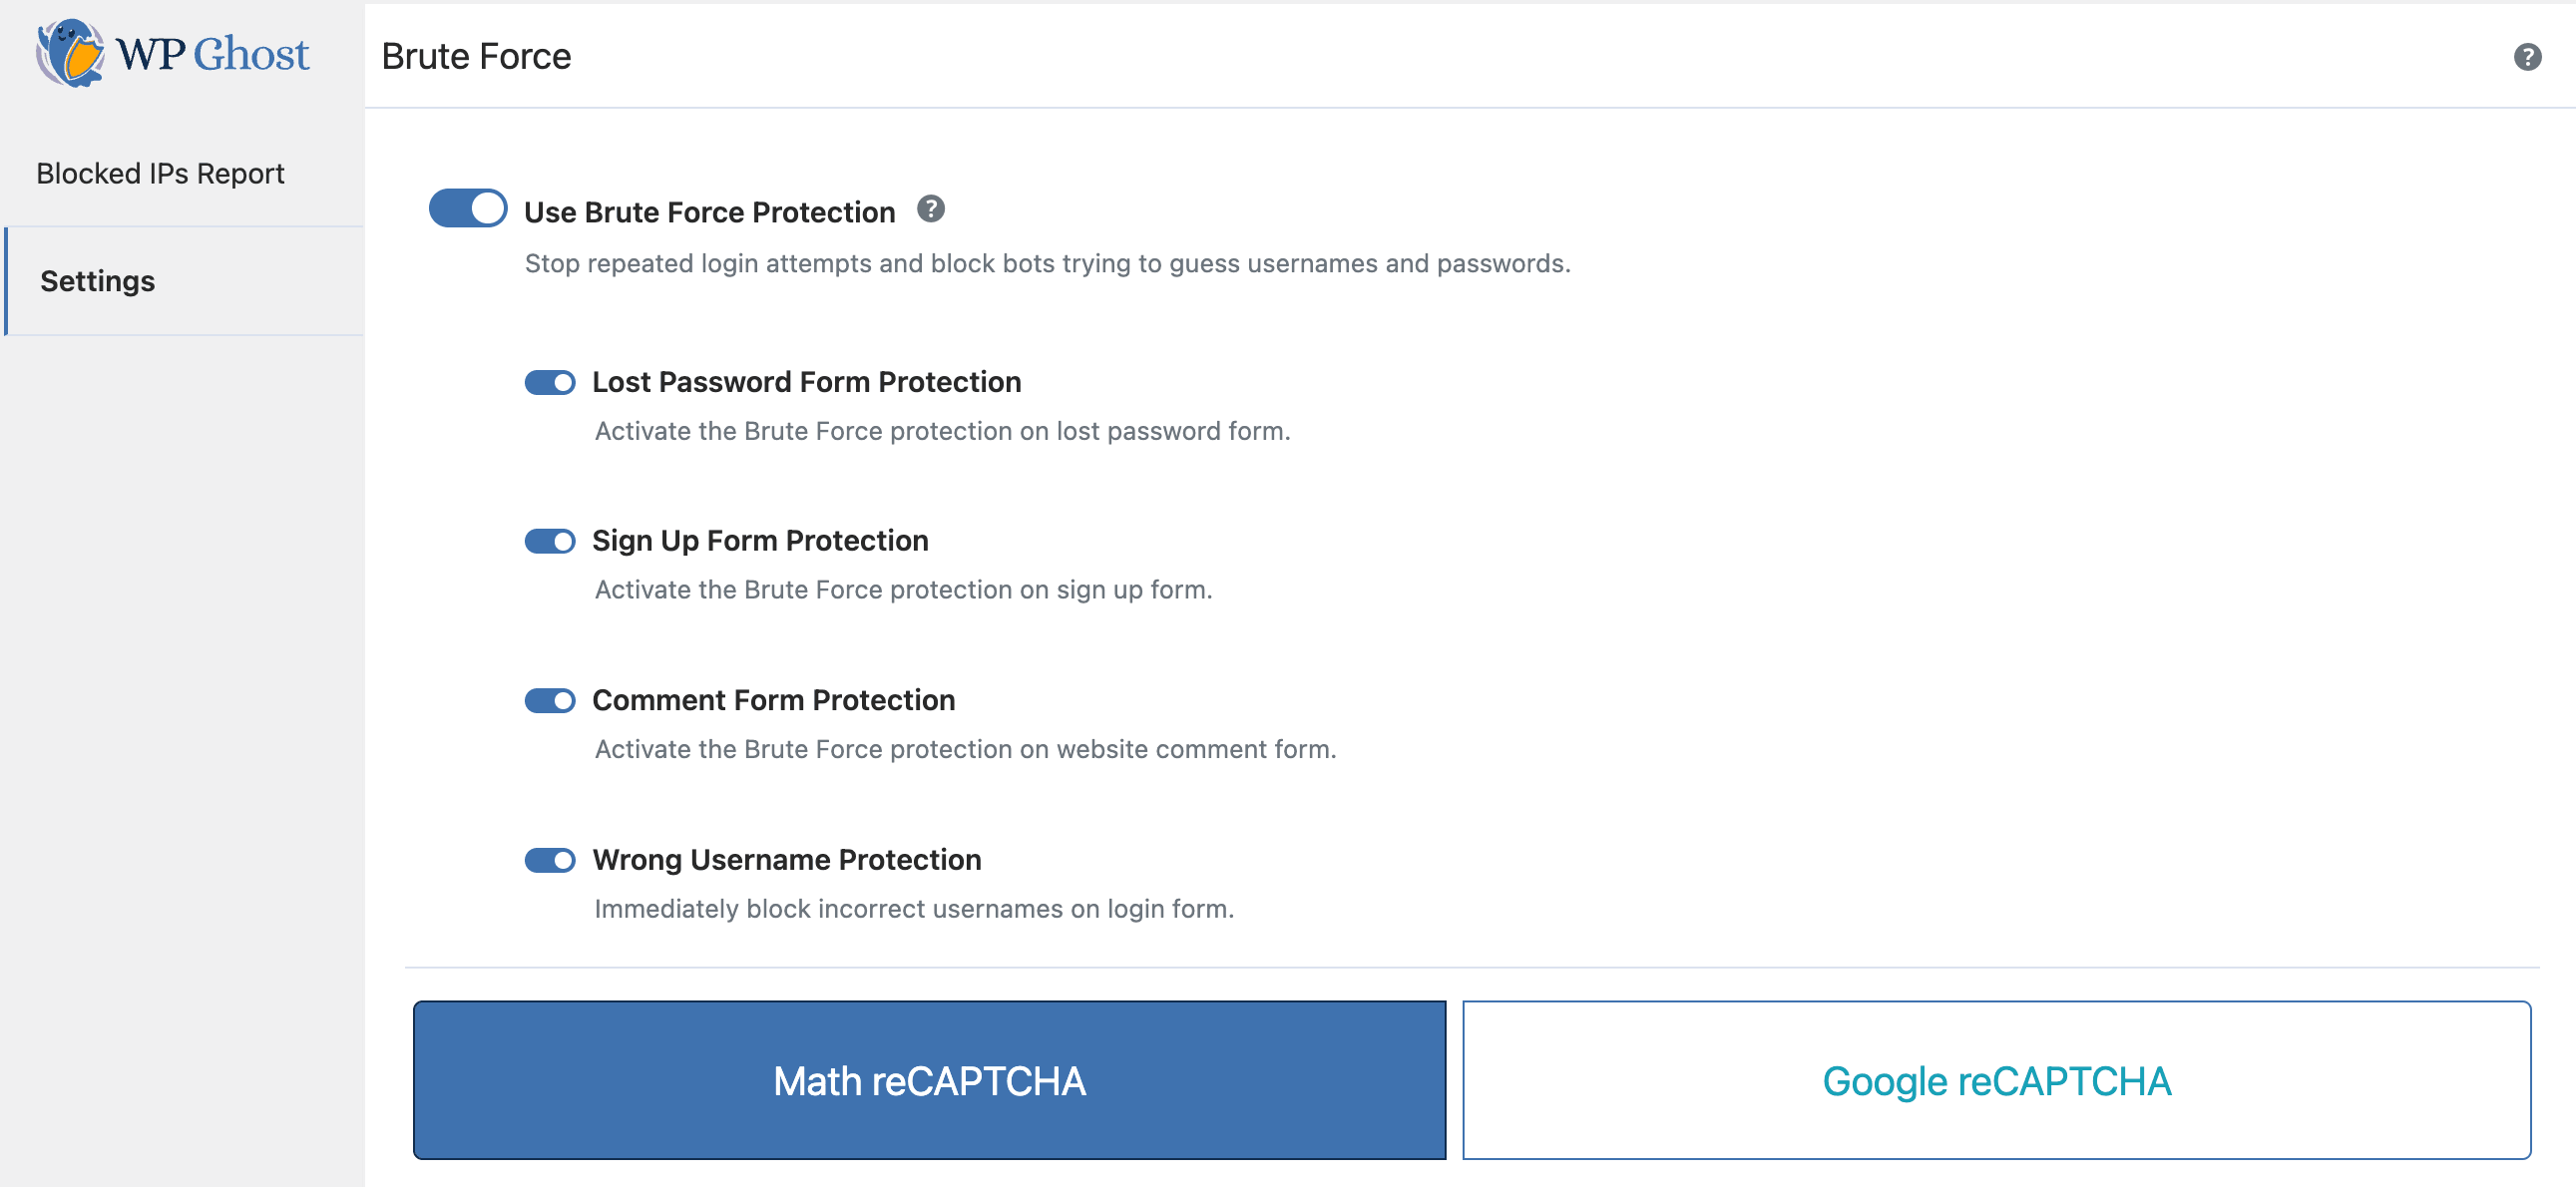
Step 1: Enable Brute Force Protection
Go to WP Ghost > Brute Force. Switch the feature on. Three reCAPTCHA options appear: Math reCAPTCHA and Google reCAPTCHA Enterprise .
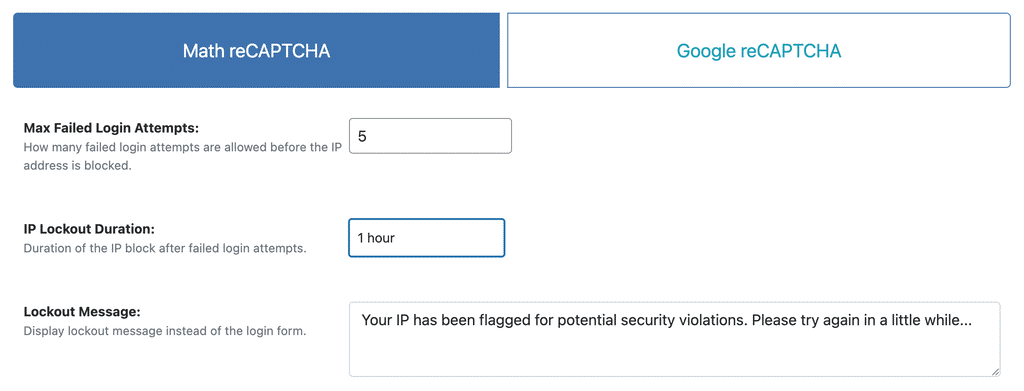
Step 2: Configure Attempt Limits and Lockout
Set the number of failed attempts before lockout. Math reCAPTCHA failures are not counted toward this limit – only actual login failures are counted. When the limit is reached, the user is blocked for the number of seconds set in the IP Lockout Duration field (default: 3600 seconds / 1 hour). You can set a custom Lockout Message that displays on the blocked login page.
Step 3: Set Up IP Whitelist and Blacklist
If you have a static IP, add it to the WP Ghost > Firewall > Whitelist to prevent accidental lockout. Use wildcard ranges for subnets (192.168.0.* or 192.168.*.*). Add known malicious IPs or ranges to the Blacklist to block them permanently.

Step 4: Configure Google reCAPTCHA (Optional)
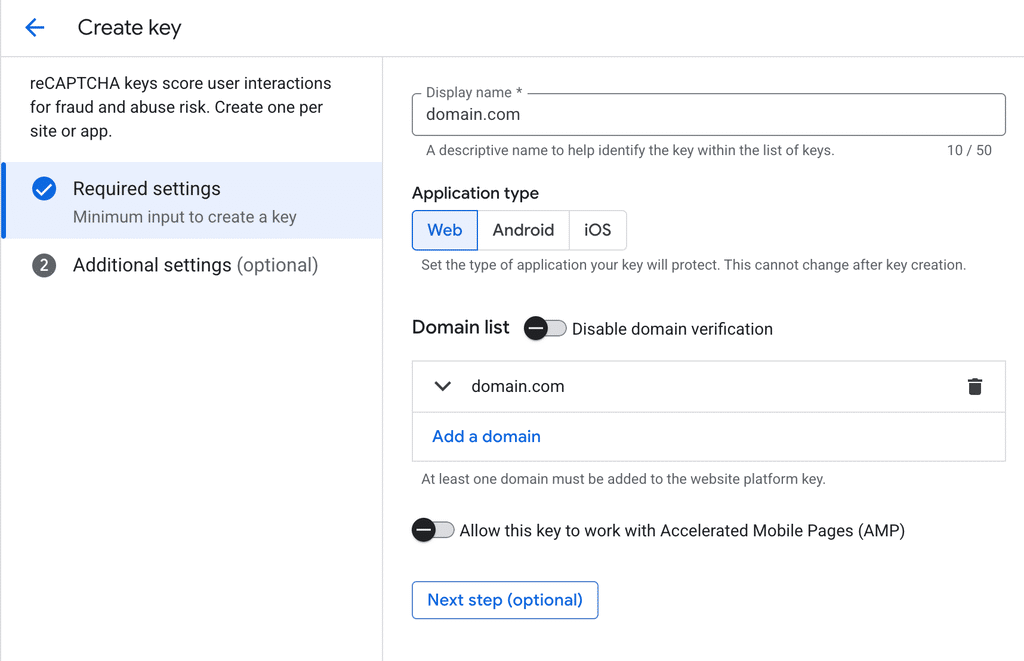
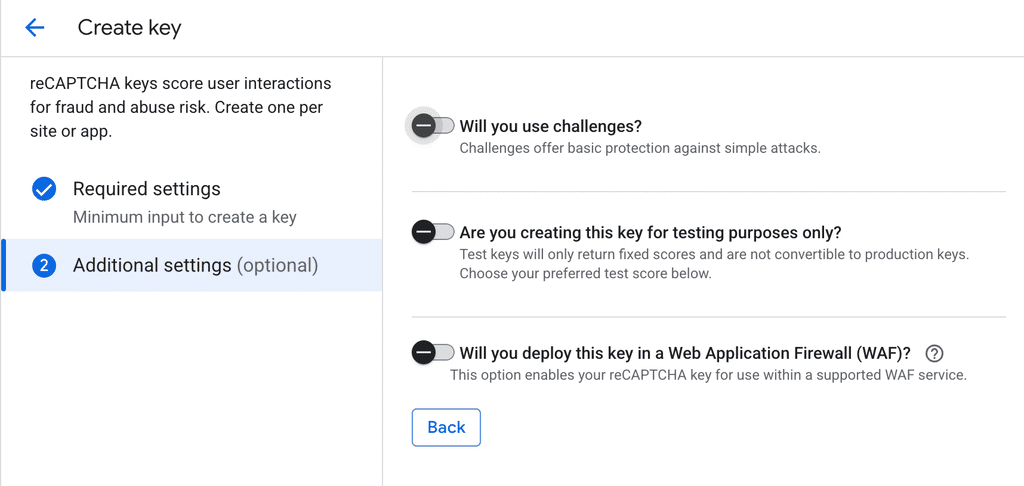
For Google reCAPTCHA Enterprise, you need API keys from Google. Go to Google reCAPTCHA admin. Create a new site, select to show the challenge (optional), add your domain, and copy the Site Key, Project ID and API Key.
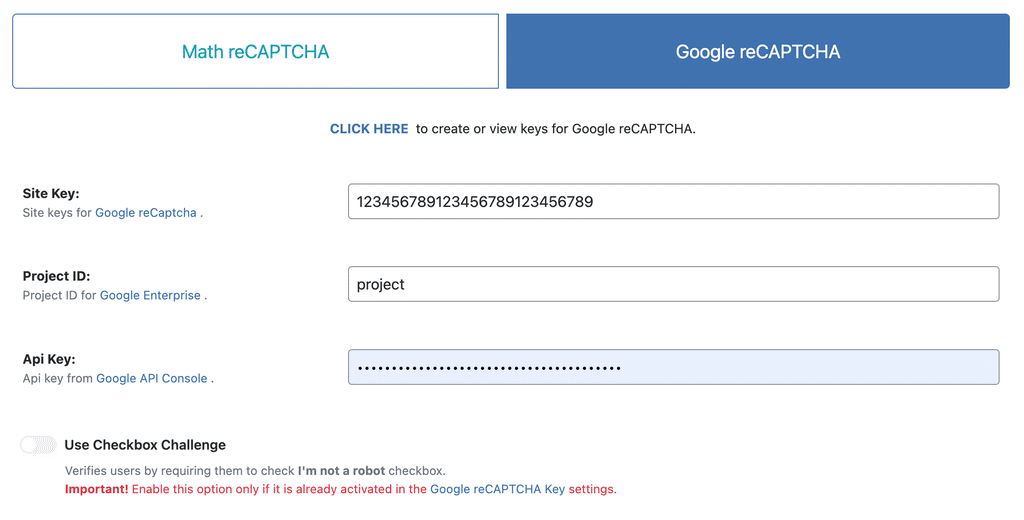

Copy the Site key and paste it into WP Ghost.
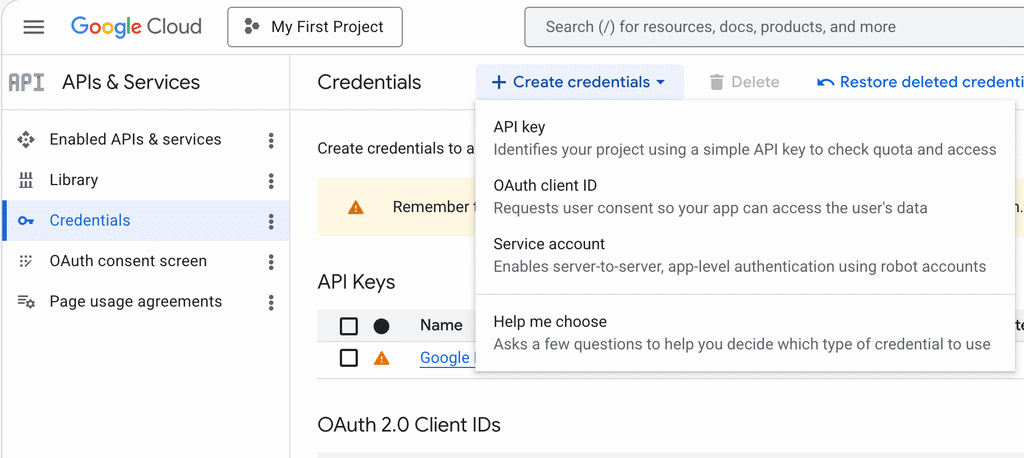
Create new API Key, copy it and paste it into WP Ghost.
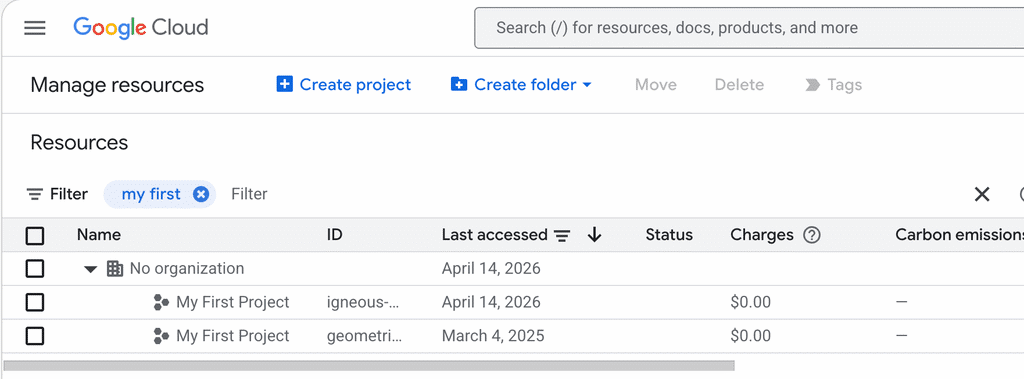
Copy the Project name ID from the projects list and paste it into WP Ghost.
Click Save to activate the Google reCaptcha option.
Use the reCAPTCHA Test button to verify the integration works before closing the settings.
Troubleshooting
Locked yourself out with brute force protection. Use the Safe URL parameter to access the login page directly. Alternatively, rename the plugin folder via FTP. See the Emergency Disable guide.
reCAPTCHA does not appear on the login page. Verify the Site Key, Project ID and API Key are correct. Check that your domain is listed in the Google reCAPTCHA admin console. check if the challenge is invisible or not – use browser developer tools to confirm it loads.
Legitimate users are being blocked. Increase the failed attempts limit. Add trusted IP ranges to the whitelist. Reduce the ban duration from 3600 seconds to a shorter period.
Frequently Asked Questions
Which reCAPTCHA type should I choose?
Math reCAPTCHA is the simplest – no API keys needed, works immediately. Google V2 (checkbox) adds a visible “I’m not a robot” challenge. Google V3 (invisible) scores visitors in the background with no user interaction. V3 provides the best user experience for legitimate visitors while blocking bots effectively.
Which forms does brute force protection cover?
Login, registration, lost password, comments, and WooCommerce login forms. This is broader than most dedicated brute force plugins, which typically only protect the login form.
Can I use a different login path for subscribers?
Yes. If your theme or a membership plugin provides its own login page for subscribers, use WP Ghost’s custom login path as a private admin-only login. Both paths can be active simultaneously.
Does WP Ghost modify WordPress core files?
No. WP Ghost uses rewrite rules and WordPress hooks. Deactivating restores all defaults.
Related Tutorials
Getting Started with WP Ghost – initial setup and path configuration.
Customize All WordPress Paths – change login, admin, and other paths.
Two-Factor Authentication – add 2FA for additional login security.
Emergency Disable Guide – recovery if locked out.
Website Security Check – verify your configuration.