WP Ghost Firewall and Geo Security – Complete Setup Guide
This tutorial has moved to the new WP Ghost Knowledge Base where each feature is presented in detail.
Configure the WP Ghost (formerly Hide My WP Ghost) firewall to block script injection and SQL injection attacks, automate IP blocking, add security headers, block theme detectors and AI crawlers, set up country blocking, and manage IP whitelisting and blacklisting.
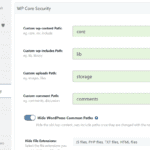
Changing your WordPress paths makes your site invisible to bots. The firewall makes it defended. Together, they form a complete hack prevention strategy.
WP Ghost includes a built-in Web Application Firewall (WAF) that filters malicious HTTP requests at the server level. It blocks SQL injection, script injection, file inclusion exploits, and directory traversal attacks before they reach WordPress core, your plugins, or your database. The firewall operates through server configuration rules (.htaccess on Apache, or WordPress initialization on NGINX/LiteSpeed), intercepting malicious requests at the earliest possible point.
This tutorial covers every option in the WP Ghost > Firewall panel, including the firewall engine, automated IP blocking, security headers, theme detector blocking, AI crawler blocking, geo security with country blocking, and IP whitelisting and blacklisting.
Why Your Site Needs Firewall Protection
According to Patchstack’s 2026 report, cross-site scripting (XSS) accounts for 47.7% of all WordPress vulnerabilities, and 57.6% of vulnerabilities can be exploited without any authentication. Attackers weaponize newly disclosed vulnerabilities within a median of just 5 hours. Traditional WAFs block only about 12% of WordPress-specific attacks.
WP Ghost’s firewall is designed specifically for WordPress. It blocks the attack patterns that target WordPress sites most frequently, and it does so before WordPress even loads.
| Without firewall | With WP Ghost firewall |
|---|---|
| SQL injection queries reach your database | Blocked at the server level before PHP processes them |
| Script injection payloads execute on your pages | Filtered by 8G rules and rejected |
| Repeat attackers keep trying from the same IP | Automatically banned after configurable threshold |
| Server headers reveal PHP version and server info | Stripped from all HTTP responses |
| Theme detectors identify your CMS and plugins | Crawlers blocked by IP and User-Agent |
| AI bots scrape your content for training | Blocked at the firewall with robots.txt rules added |
Firewall Against Injections
The core firewall engine blocks malicious queries and parameters in HTTP requests. It protects against script injection, SQL injection, file inclusion exploits, and directory traversal attacks by filtering harmful patterns before they reach your WordPress installation.
To activate it, go to WP Ghost > Overview or WP Ghost > Firewall and switch on Firewall Against Script Injection.
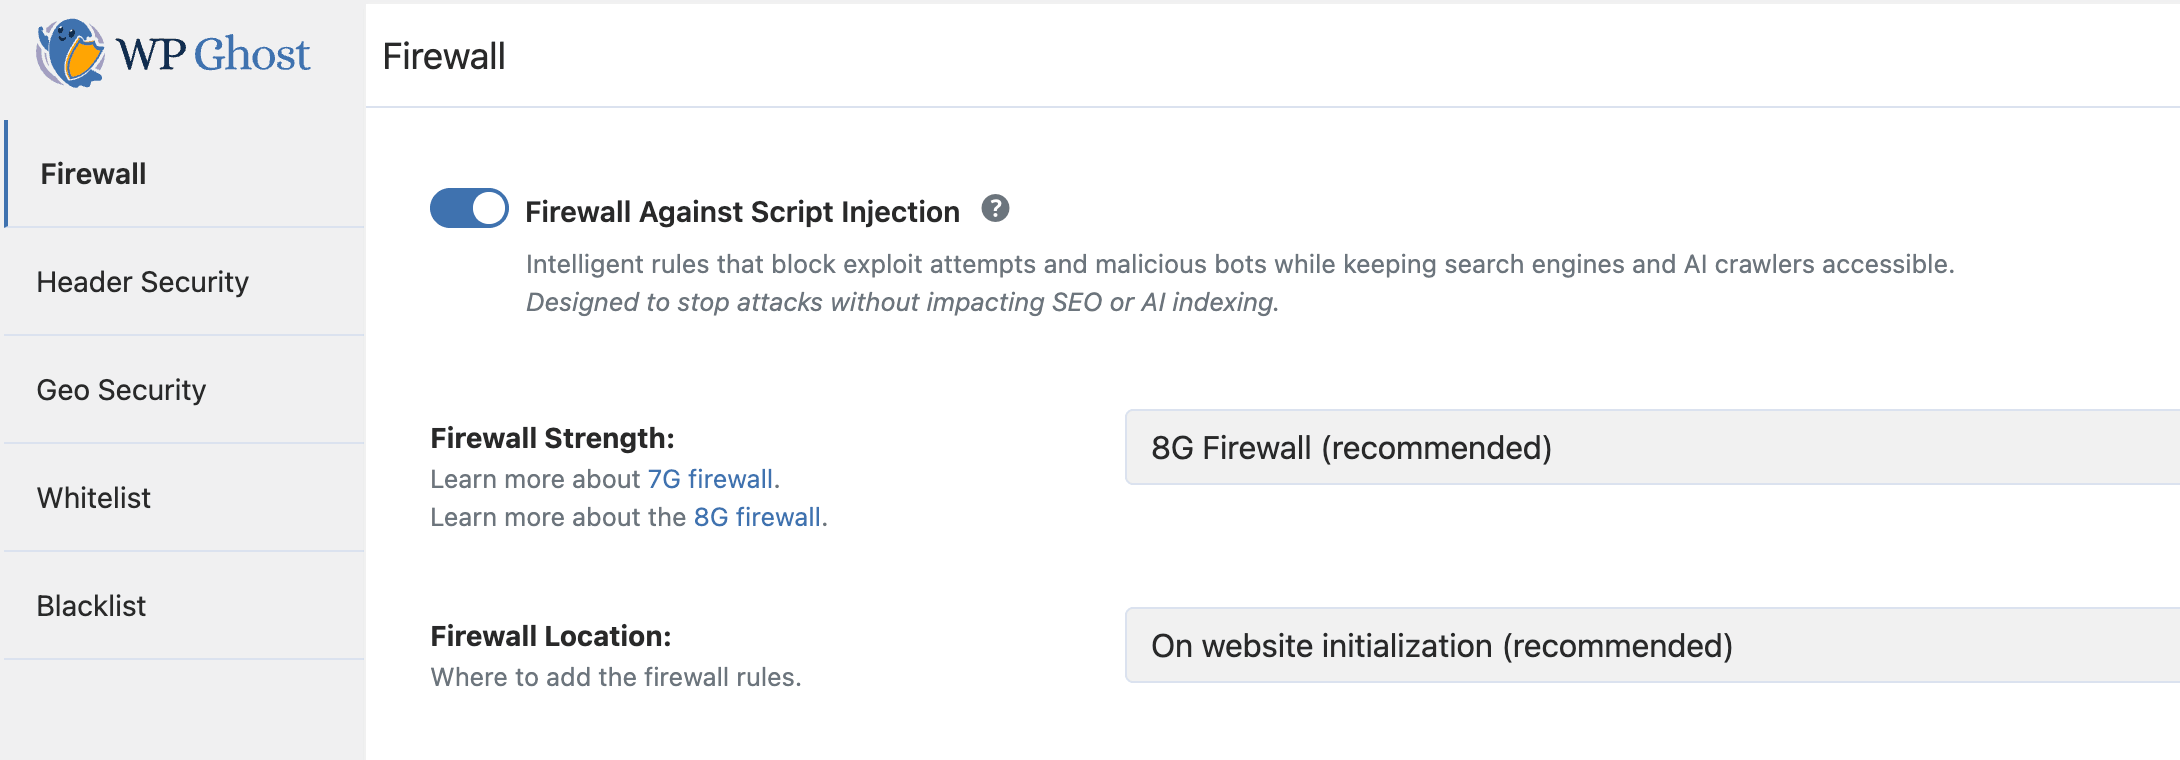
After activation, select your firewall level:
Minimal – the most compatible option. Start here if you are unsure or if other firewall levels cause issues with your plugins or theme.
Medium – extended pattern matching. Blocks more attack vectors while maintaining broad compatibility.
7G Firewall – comprehensive server-level filtering based on Jeff Starr’s 7G ruleset. Blocks script injection, SQL injection, and common exploit patterns.
8G Firewall (recommended) – the latest and most advanced ruleset, updated in 2026. Includes all 7G protections plus updated patterns for modern attack techniques.
On Apache servers, you can place firewall rules directly in the .htaccess file (fastest, blocks at web server level) or load them during WordPress initialization (broader compatibility).
The 8G Firewall
The 8G Firewall, developed by security expert Jeff Starr, is the most advanced firewall ruleset available in WP Ghost. It provides advanced protection against script injection, SQL injection, and exploit attempts through lightweight server-level filtering that blocks malicious requests before they reach WordPress core.
Learn more about the 8G Firewall
Note: The 7G and 8G Firewall options may not be compatible with all server configurations. If you experience issues with legitimate functionality, try Medium or Minimal levels first.
Automate IP Blocking
The firewall can automatically ban IP addresses that trigger repeated attacks. Instead of manually blacklisting IPs, you set a rule and WP Ghost enforces it.
Go to WP Ghost > Firewall and switch on Automate IP Blocking.
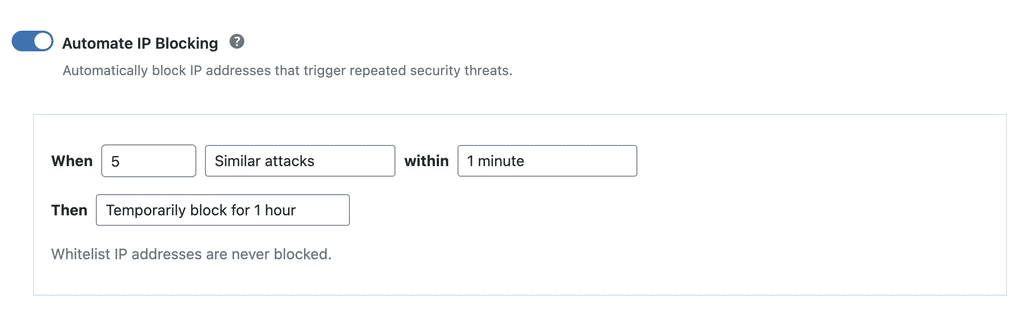
Configure the rule by setting the number of attacks that trigger a block, the time window, and whether the block is temporary or permanent. For example, you can block an IP permanently if it triggers 10 similar attacks within 1 minute. Whitelisted IPs are never blocked by this feature.
Search Engine Crawling Whitelisting
When the firewall is active, WP Ghost automatically whitelists major search engine crawlers like Googlebot, Bingbot, and Yandex. This ensures your SEO and search engine indexing are not affected by the firewall rules. Legitimate crawlers index your site normally while malicious traffic gets blocked.
Header Security
Security Headers
Security headers tell browsers how to handle your site’s content and connections. They protect against cross-site scripting (XSS), clickjacking, content sniffing, and other code injection attacks.
Go to WP Ghost > Overview or WP Ghost > Firewall > Header Security and switch on Add Security Headers for XSS and Code Injection Attacks.
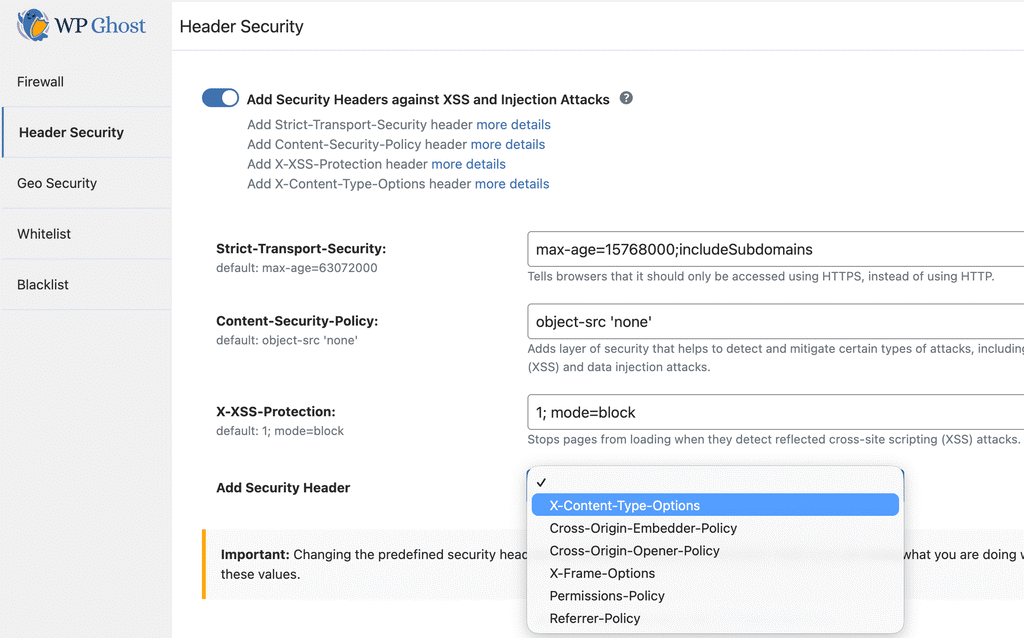
WP Ghost adds the following headers through your config file and PHP, with values optimized for both security and site functionality: Strict-Transport-Security (forces HTTPS connections), Content-Security-Policy (controls which resources can load), X-Frame-Options (prevents clickjacking), X-XSS-Protection (browser-level XSS filtering), X-Content-Type-Options (prevents MIME sniffing), Cross-Origin-Embedder-Policy (controls cross-origin embedding), and Cross-Origin-Opener-Policy (isolates browsing context).
Select additional headers from the dropdown in the settings panel.

After saving, test your headers at securityheaders.com to verify they are active. For advanced Content-Security-Policy configuration, see the Content Security Policy (CSP) tutorial.
Remove Unsafe Headers
Your server sends headers that reveal your PHP version, server software, server signature, and WordPress-related information. Attackers use this data to identify which exploits to use against your site.
Go to WP Ghost > Firewall > Header Security and switch on Remove Unsafe Headers.

This removes the PHP version header (X-Powered-By), server info, server signature, and WordPress-related headers from all HTTP responses.
Block Theme Detectors
Theme detectors like BuiltWith, Wappalyzer, WhatCMS, IsItWP, WP Theme Detector, and Scan WP use automated crawlers to identify your CMS, theme, and plugins. WP Ghost blocks these crawlers by filtering their IPs and User-Agent names.
Go to WP Ghost > Firewall > Header Security and switch on Block Theme Detectors Crawlers.

For the complete guide on making your site invisible to detectors, see the Hide From WordPress Theme Detectors article.
Block AI Crawler Bots
AI training crawlers like GPTBot, ClaudeBot, PerplexityBot, CCBot, Bytespider, and over 30 others visit websites to collect content for training large language models. WP Ghost lets you block all of them with a single toggle.
Go to WP Ghost > Firewall and switch on Block AI Crawler Bots.

When enabled, WP Ghost blocks these crawlers at the firewall level and automatically adds the corresponding Disallow rules to your robots.txt file. The AI crawler list is updated automatically with each plugin release.
This feature targets AI training crawlers only. It does not affect regular search engine indexing (Google, Bing, Yahoo), social media crawlers, or any other standard web traffic.
Consider the trade-off: If your site benefits from appearing in AI-powered search answers (like ChatGPT search or Perplexity answers), blocking these crawlers removes your content from those ecosystems. Only enable this if protecting your content from AI training is a priority.
Geo Security
Geo security lets you control access to your website based on the geographic location of incoming traffic. If your site serves a specific region, you can block entire countries where hacking activity is concentrated. This significantly reduces the noise in your security logs and prevents attacks from reaching your site.
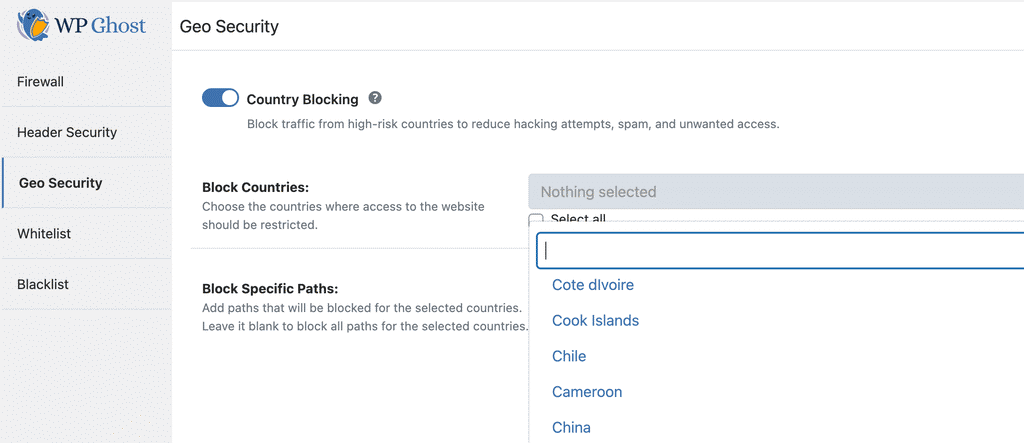
Country Blocking
Go to WP Ghost > Overview or WP Ghost > Firewall > Geo Security and switch on Country Blocking.

WP Ghost uses a geolocation database to identify the country of each IP address. The accuracy is over 99%, though occasional inaccuracies may occur due to IP address changes.
Block Specific Countries
Navigate to the Blocked Countries section in WP Ghost > Firewall > Geo Security. Search and select the countries you want to block.

Only block countries that pose a real threat, such as those generating frequent failed logins, many 404 errors, or other malicious activity. Re-evaluate your blocked countries periodically to make sure you are not restricting legitimate visitors unnecessarily.
Block Specific Paths
Instead of blocking an entire country from your full site, you can block access only to specific paths like /login or /my-account. This effectively prevents brute force attacks from those countries while still allowing general browsing.
If you leave the paths field blank, WP Ghost blocks access from the selected countries to your entire site.

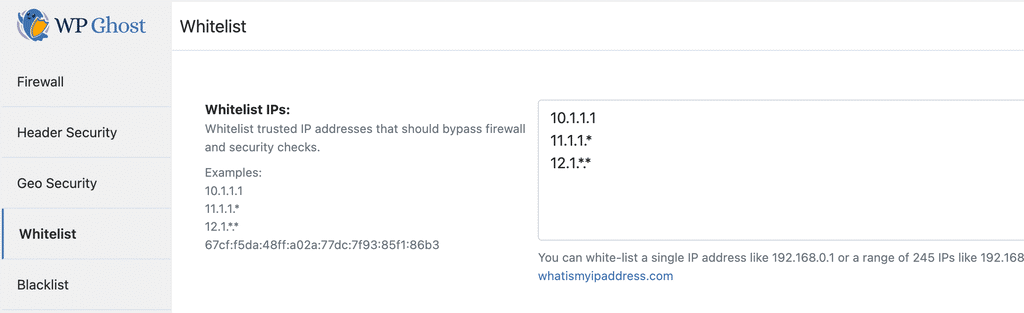
Whitelisting
WP Ghost’s whitelisting ensures that trusted IPs are never blocked and specific paths are always accessible, regardless of firewall rules, brute force limits, or country blocking. All whitelisting settings are in WP Ghost > Firewall > Whitelist.
Whitelist Level
Choose how much access whitelisted IPs receive. Three levels are available:
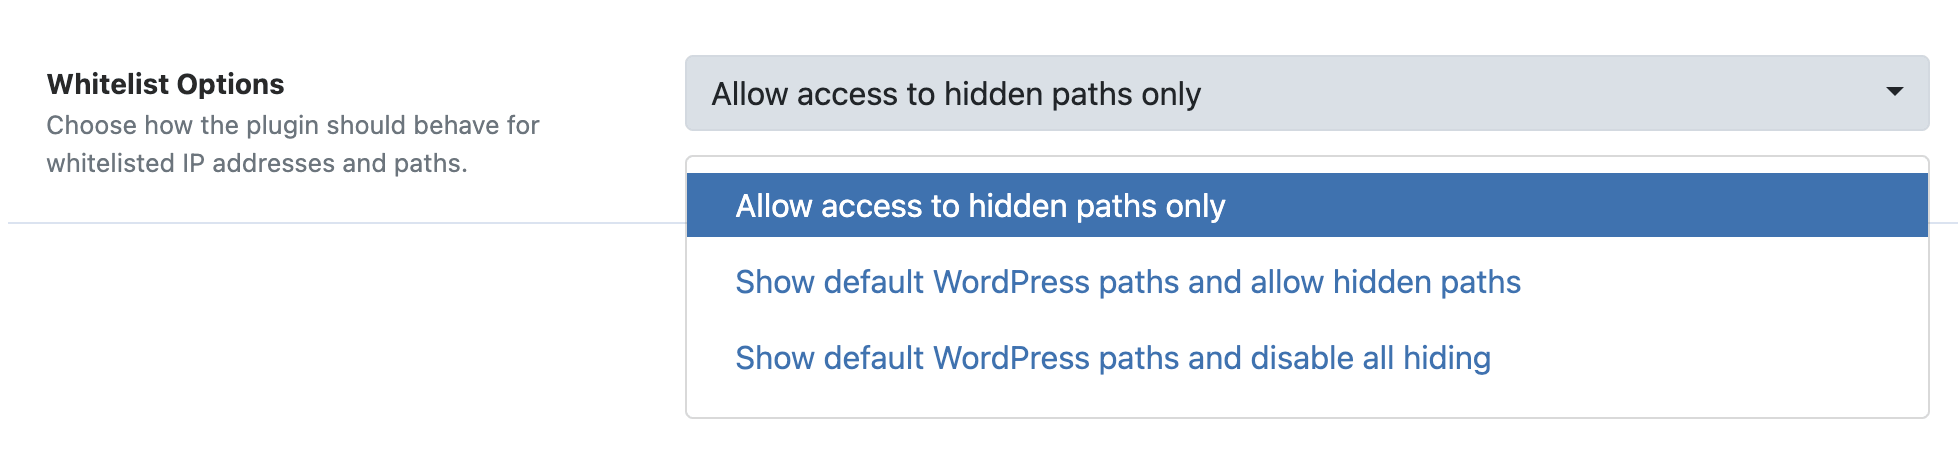
Allow Hidden Paths – whitelisted IPs can access the hidden paths (like the original /wp-admin) while still seeing custom paths in the source code. This is the recommended level for most use cases.
Show Default WordPress Paths and Allow Hidden Paths – whitelisted IPs see both custom paths and original default WordPress paths. Useful for debugging.
Allow Everything – full unrestricted access with no security checks, no keyboard/mouse restrictions, and no hidden paths. The site behaves as if WP Ghost is not active. Use this only temporarily for your own IP during troubleshooting.
Whitelist IP Addresses
Add your own IP and your team’s IPs to the whitelist to prevent accidental lockouts. Whitelisted IPs bypass the firewall, brute force limits, automated IP blocking, and country blocking.
Enter individual IPs or use wildcards for ranges: 192.168.0.* (entire subnet), 192.168.*.* (entire class B range), or 192.*.*.* (entire class A range).
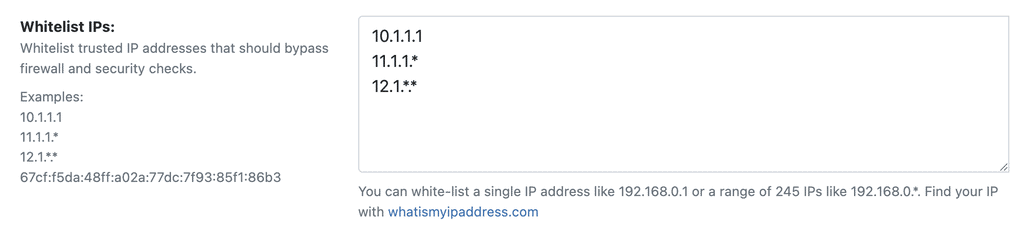
Best practice: Only whitelist IPs you fully trust. Every whitelisted IP bypasses your security protections at the selected whitelist level.
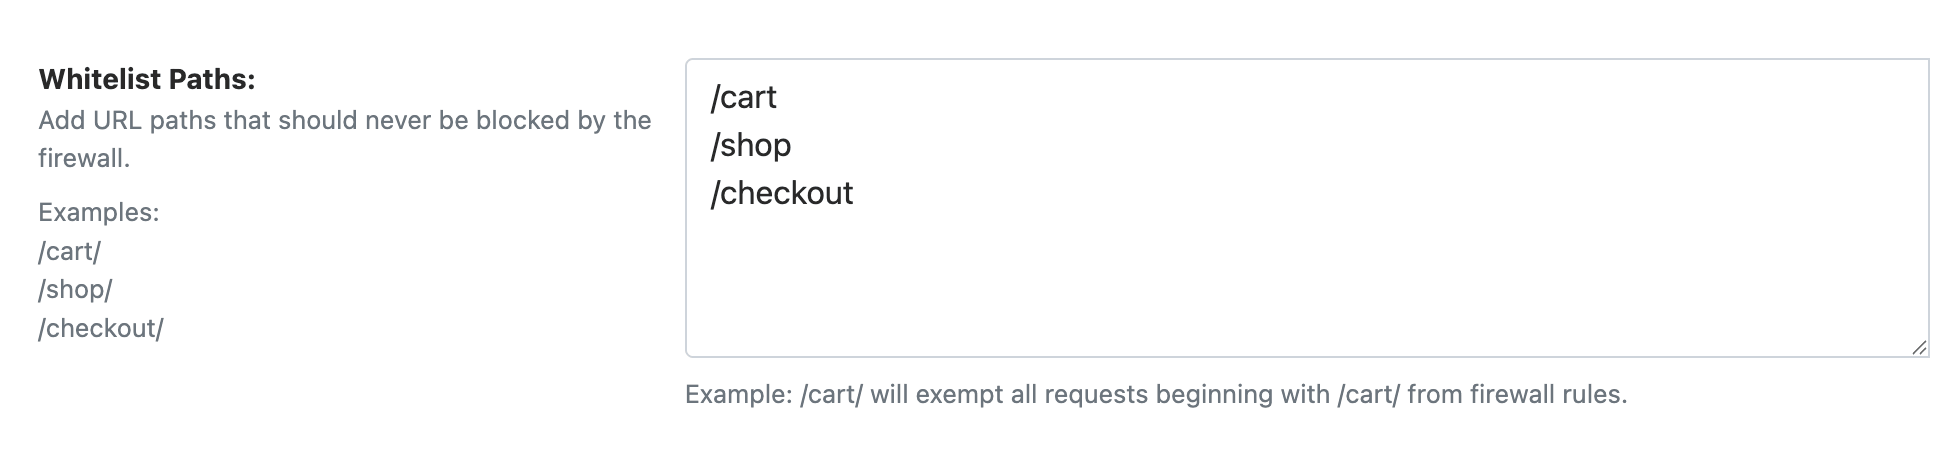
Whitelist Paths
Specify URL paths that should always be accessible, regardless of firewall rules or other restrictions. Whitelisting a path also whitelists all its subpaths.
For example, whitelisting /cart/ makes every URL beginning with /cart/ accessible, including /cart/checkout/ and /cart/apply-coupon/. This is particularly useful for e-commerce sites where cart and checkout pages need to bypass restrictions like Disable Paste or firewall rules that interfere with form submissions.
Blacklisting
The blacklist gives you manual control to block known threats by IP address, user agent, referrer, and hostname. While the firewall blocks by attack pattern and automated IP blocking catches repeat offenders, the blacklist lets you permanently block specific sources you have identified in your security logs.
All blacklisting settings are in WP Ghost > Firewall > Blacklist. The feature becomes active as soon as you add data to any of its options.

Blacklist IP Addresses
Block specific IPs or entire IP ranges that have been identified as malicious sources. Enter individual IPs or use wildcards: 192.168.0.*, 192.168.*.*, or 192.*.*.* to block an entire class.

Block by User Agent
User agents identify the software making a request. Malicious bots and scraping tools send distinctive user agent strings. Blocking a user agent catches all requests from that tool, regardless of which IP it uses.

Block by Referrer
Block traffic arriving from specific referring URLs or domains. This stops visits from spam referrer domains, malicious link sources, or any URL you have identified as a threat source.

Block by Hostname
Block traffic based on the visitor’s reverse DNS hostname. This is useful for blocking traffic from specific hosting providers or ISPs associated with malicious activity.

Performance note: Hostname blocking requires a reverse DNS lookup for each visitor, which adds processing time. Use this option only when you specifically need to block by hostname. IP blocking is more efficient for most use cases.
Troubleshooting
Legitimate Functionality Blocked by the Firewall
Some plugins or theme features may use query patterns that match firewall rules. If a form submission, AJAX request, or admin action stops working after enabling the firewall, try a lower firewall level (Medium or Minimal). You can also whitelist specific paths in WP Ghost > Firewall > Whitelist to exclude them from firewall filtering.
Search Engine Crawlers Being Blocked
WP Ghost automatically whitelists major search engine crawlers when the firewall is active. If you notice indexing issues, check your security logs to see if a legitimate crawler is being blocked. Never add Googlebot, Bingbot, or other legitimate crawlers to the blacklist, as this will negatively impact your search rankings.
Blocking access to countries in North America and Europe could also prevent search engine crawlers from indexing your site. Use path-based country blocking instead of full-site blocking when possible.
Google Ads Compliance
If you use Google Ads, be cautious with country blocking. Google Ads policies prohibit blocking any country from viewing pages with ads. If you receive a compliance warning, use path-based country blocking and restrict only the paths without Google Ads, not the entire site.
Related Tutorials
Continue securing your WordPress site with these guides:
Getting Started with WP Ghost – install, activate, and choose your security level.
Customize All WordPress Paths – change every WordPress path in the Change Paths panel.
Brute Force Attack Protection – protect login forms with reCAPTCHA and attempt limits.
Content Security Policy (CSP) – advanced security header configuration.
The 8G Firewall Protection – deep dive into the 8G ruleset.
7G Firewall for WordPress – details on the 7G ruleset.
Activate Security Tweaks – remove WordPress fingerprints and enable additional hardening.
Hide From WordPress Theme Detectors – complete guide to CMS anonymity.
Security Monitor – set up the Security Threats Log and email alerts (Premium).
Website Security Check – run a complete security audit.
Geo Security Country Blocking – detailed guide for geographic access control.