How to Activate Security Tweaks in WP Ghost – Complete Guide
This tutorial has moved to the new WP Ghost Knowledge Base where each feature is presented in detail.
Activate security tweaks in WP Ghost (formerly Hide My WP Ghost) to remove WordPress fingerprints, control redirects, secure feeds and sitemaps, hide version tags and HTML comments, and disable right-click, inspect element, and other browser actions.
Changing your WordPress paths is the first layer of protection. But theme detectors and advanced bots look for more than just paths. They scan for WordPress version tags in your source code, generator META tags in your header, HTML comments left by plugins, DNS prefetch links pointing to WordPress.org, and even style IDs that reveal which plugins you use.
The Tweaks panel in WP Ghost gives you control over all of these signals. Each option in this section removes a specific WordPress fingerprint or adds a security behavior that makes your site harder to identify and harder to attack.
This tutorial covers every option in the WP Ghost > Tweaks panel, organized by section: Redirects, Change Options, Feed and Sitemap, Hide Options, and Disable Options.
Why Security Tweaks Matter
Even after you change all your WordPress paths, theme detectors like BuiltWith, Wappalyzer, and WhatCMS can still identify your site as WordPress by reading secondary signals. A single generator META tag, a version number appended to a CSS file, or an HTML comment left by a popular plugin is enough for these tools to confirm your CMS.
According to Patchstack’s 2026 report, attackers weaponize newly disclosed vulnerabilities within a median of just 5 hours. If a bot knows you are running WordPress and can identify your exact plugin versions from source code, it can target your site with the right exploit almost immediately. Removing these signals does not just hide your CMS from detectors, it removes the reconnaissance data that bots need to launch targeted attacks.
Here is what security tweaks protect against:
| WordPress signal | Without tweaks (exposed) | With WP Ghost tweaks (secured) |
|---|---|---|
| Generator META tag | Reveals “WordPress 6.x” in header | Removed completely |
| Version numbers on CSS/JS | Shows plugin and theme versions | Stripped or replaced with random number |
| HTML comments | Plugin names visible in source code | Removed from output |
| DNS prefetch | Points to s.w.org (WordPress CDN) | Removed |
| RSD header | Confirms WordPress service | Removed |
| Admin toolbar | Shows WordPress admin classes | Hidden for selected roles |
| Feed/sitemap paths | Reveal wp-content in image URLs | Changed to custom paths |
| Source map references | Reveal file names and build structures | Stripped from output |
| Login page appearance | Default WordPress look | Custom branded design |
Redirects
Redirect Hidden Paths
When someone tries to access a protected WordPress path (like the old /wp-admin or /wp-login.php after you have changed them), WP Ghost can redirect them to another page instead of showing an error.
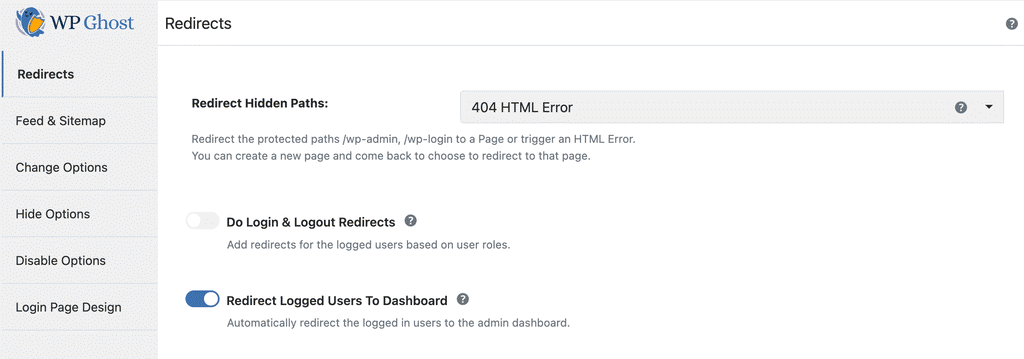
By default, visitors who hit a protected path are redirected to your Front Page. You can change this to any page on your site, or choose to show a 404 HTML error, a 403 HTML error, or redirect to a 404 Page.
This is useful for two reasons. For legitimate visitors who bookmarked an old URL, they get a clean redirect instead of a confusing error. For bots, a redirect or error page stops the attack in its tracks.
Go to WP Ghost > Tweaks > Redirects > Redirect Hidden Paths and select your preferred redirect destination from the dropdown.

If none of the default options fit your needs, create a new page in WordPress and come back to this section to select it as your redirect target.
For more details on redirect configuration, see the dedicated Redirect Visitors article.
Login Redirect URL and Logout Redirect URL
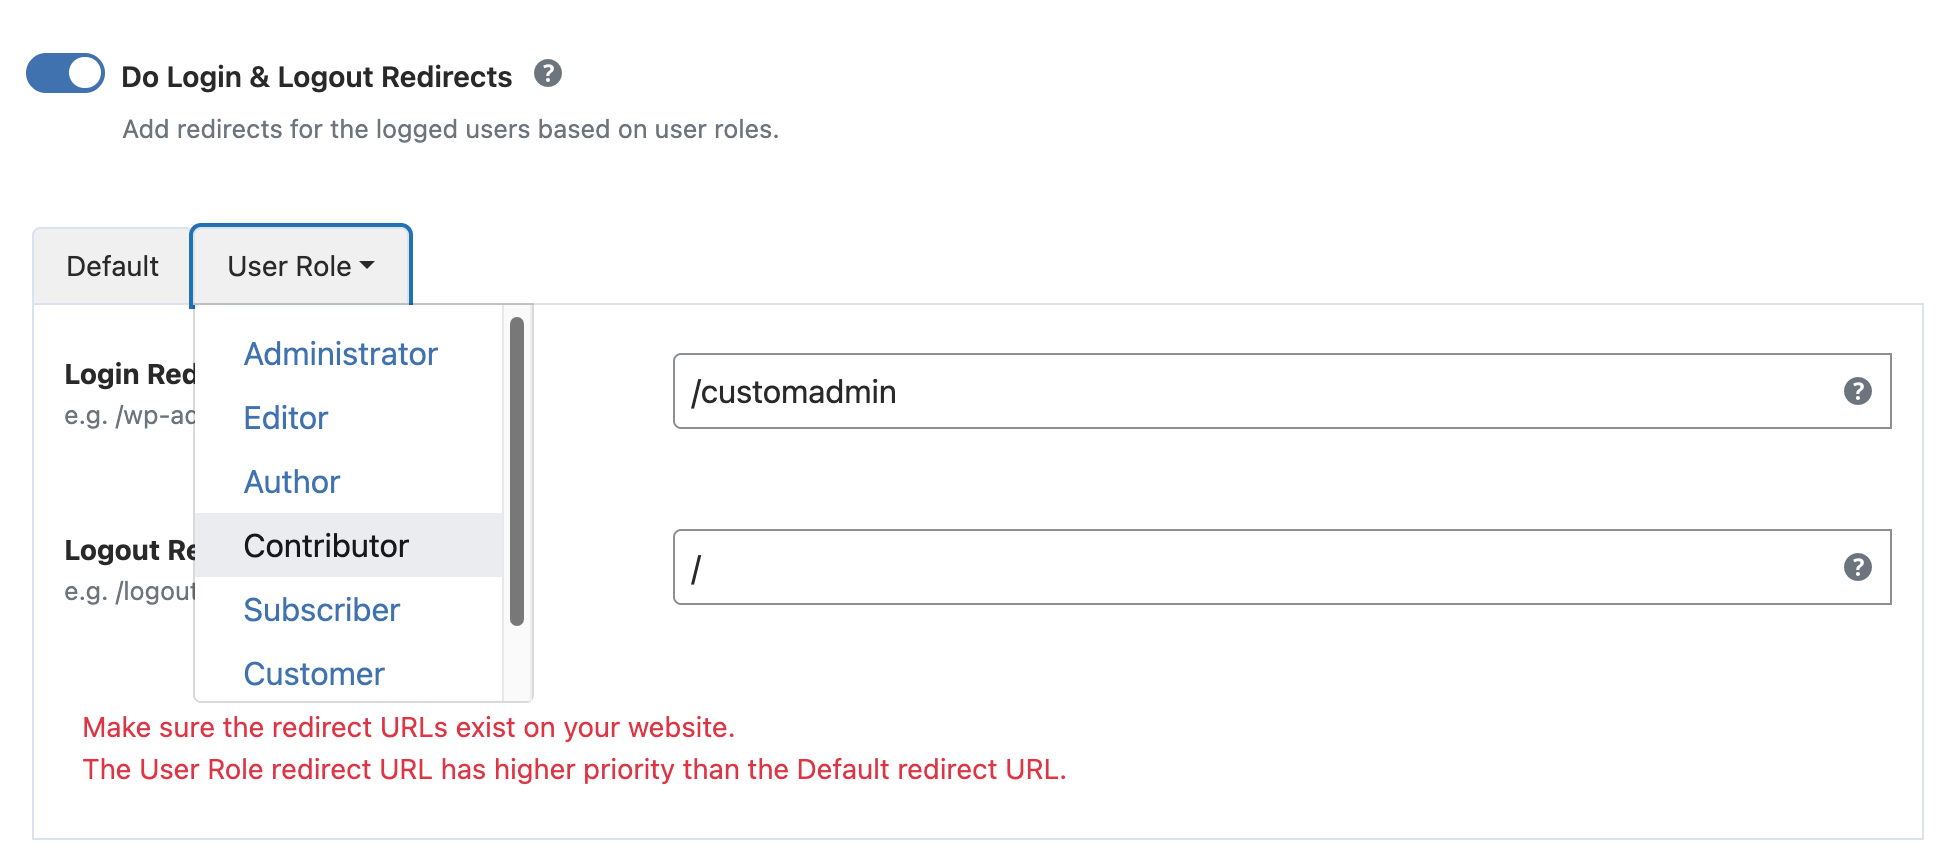
WP Ghost lets you set custom redirect URLs after login and logout, based on user role. This means administrators, editors, authors, and customers can each land on different pages after logging in or out.
Go to WP Ghost > Tweaks > Redirects > Do Login and Logout Redirects.
You have two configuration options. The Default tab sets the same redirect URL for all users. The User Role tab lets you set individual redirect URLs per role. For example, you can send customers to their account page and editors to the post list. User Role settings take priority over Default settings.
You can use relative or absolute URLs. Relative URLs are recommended because they continue to work if your domain ever changes.
For more details, see the Redirect Logged Users article.
Redirect Logged Users To Dashboard
When this option is active, a user who is already logged in will be automatically redirected to the admin dashboard when they visit the login page. This saves time and prevents confusion for returning users.
Go to WP Ghost > Tweaks > Redirects > Redirect Logged Users To Dashboard.
Change Options
Change Paths for Logged Users
By default, WP Ghost only changes paths for visitors who are not logged in. When you enable this option, the custom paths are also applied for logged-in users like customers, subscribers, and editors.
This is especially useful for e-commerce sites or membership sites where logged-in customers should not see WordPress common paths in their browser. Most themes work correctly with this enabled, but some require the original paths to function properly for logged-in users.
Go to WP Ghost > Tweaks > Change Options > Change Paths for Logged Users.

For the full guide, see the Change Paths for Logged Users article.
Change Paths In Cached Files
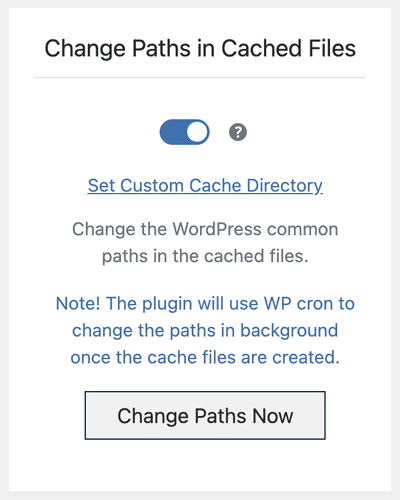
If you use a cache plugin, your CSS, JS, and HTML content are stored in a cache directory. These cached files may still contain the old WordPress paths even after you changed them in WP Ghost.
When you enable this option, WP Ghost runs a background process every minute that scans the cache directory and replaces any unchanged paths with your custom ones. This process does not affect your site’s loading speed and works with all WordPress cache plugins.
Go to WP Ghost > Tweaks > Change Paths In Cached Files (accessible from the sidebar).
For the full guide, see the Change Paths In Cached Files article.
Change Relative URLs to Absolute URLs
Relative URLs like /images/logo.png can sometimes point to old WordPress paths that reveal your site structure. When you enable this option, WP Ghost converts all relative URLs in your HTML output to absolute URLs (like https://yourdomain.com/images/logo.png), making it easier to identify and change any remaining old path references.
Go to WP Ghost > Tweaks > Change Options > Change Relative URLs to Absolute URLs.

For the full guide, see the Change Relative URLs to Absolute URLs article.
CMS Simulator
The CMS Simulator makes your WordPress site appear as if it runs on Drupal or Joomla. It injects fake meta tags and HTML signatures into your source code that trick theme detectors and bot scanners into identifying the wrong CMS.
This feature is most effective when used as the final layer, after you have changed all WordPress paths, hidden common files, and removed version tags. The CMS Simulator adds false signals on top of a clean source code.
Go to WP Ghost > Tweaks > Change Options, select a Drupal or Joomla version from the CMS Simulator dropdown, and click Save.
For the full guide, see the CMS Simulator tutorial.
Feed and Sitemap
Why Feed and Sitemap Security Matters
Your RSS feed and sitemap.xml file contain image URLs that point directly to your wp-content directory. Theme detectors routinely check these files to confirm whether a site runs WordPress, even when all visible paths have been changed. The robots.txt file can also reveal WordPress paths like /wp-admin and /wp-includes. Securing these three files closes a common detection gap.
Hide Feed and Sitemap Link Tags
This option removes the /feed and /sitemap.xml link tags from your website’s header. These tags are visible in the source code and can be used by detectors to find your feed and sitemap URLs.
Go to WP Ghost > Tweaks > Feed and Sitemap > Hide Feed and Sitemap Link Tags.

Change Paths in RSS Feed
Your RSS feed (accessible at yourdomain.com/feed/) contains image URLs that use your WordPress paths. This option replaces all image paths in the feed with your custom paths so the feed does not reveal your original WordPress directory structure.
Go to WP Ghost > Tweaks > Feed and Sitemap > Change Paths in RSS Feed.

Change Paths in Sitemaps XML
For proper SEO, your sitemap.xml should reflect your custom paths rather than the default WordPress ones. This option replaces all image paths in your sitemap with your custom paths, keeping your sitemap compliant with Google and other search engine requirements.
Go to WP Ghost > Tweaks > Feed and Sitemap > Change Paths in Sitemaps XML.

You can also activate Remove Plugin Authors and Style from Sitemap XML. SEO plugins like Yoast SEO, Squirrly SEO, and Google Sitemap XML add their author name and custom styling to your sitemap. This does not help with SEO, but it tells theme detectors exactly which plugins you use. Removing it closes another detection vector. For more details, see the Remove Authors and Style in Sitemap XML article.
Change Paths in Robots.txt
The default WordPress robots.txt file contains references to /wp-admin and /wp-includes, which immediately confirms your CMS to anyone who checks it. This option removes those WordPress-specific paths and replaces them with the minimum rules needed for proper search engine indexing.
Your SEO and search rankings are not affected. All required links remain in the sitemap and all necessary rules stay in robots.txt.
Go to WP Ghost > Tweaks > Feed and Sitemap > Change Paths in Robots.txt.

Hide Options
Hide Admin Toolbar
The WordPress admin toolbar appears at the top of the page for logged-in users. It uses admin-specific CSS classes that can reveal your CMS identity. On e-commerce sites, membership sites, or client portals, there is usually no reason for customers to see the admin toolbar.
Go to WP Ghost > Tweaks > Hide Options > Hide Admin Toolbar.

You can select which user roles should not see the toolbar. By default, it is hidden for Subscribers and Customers. Use the dropdown to add or remove roles as needed. At least one user role must be selected when this option is enabled.
For the full guide, see the Hide Admin Toolbar article.
Hide Version from Images, CSS and JS
WordPress appends version numbers to every CSS, JS, and image file loaded in your source code (like style.css?ver=6.5). These version numbers tell bots and detectors exactly which version of WordPress, themes, and plugins you are running, making it easy to match known vulnerabilities to your site.
This option strips all version parameters from CSS stylesheets, JavaScript files, and images in your source code. It also removes the WordPress Generator META tag from the header, which otherwise displays your WordPress version to anyone who views your source.
Go to WP Ghost > Tweaks > Hide Options > Hide Version from Images, CSS and JS in WordPress.
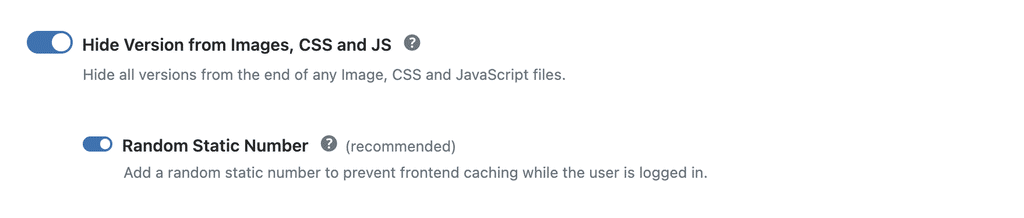
To enable cache-busting, switch on WP Ghost > Tweaks > Hide Options > Random Static Number. This adds a random number to file URLs so browsers always load the current version of your files.
For the full guide, see the Hide WordPress Version article.
Hide IDs from META Tags
WordPress adds identifiable IDs to link, style, and script tags in your source code. These IDs often contain plugin and theme names that theme detectors use to identify your setup. This option removes those IDs from all META tags in your frontend output.
Go to WP Ghost > Tweaks > Hide Options > Hide IDs from META Tags.

For the full guide, see the Hide IDs from META Tags article.
Hide WordPress Generator META Tags
WordPress adds a generator META tag to your page header that looks like this: meta name=”generator” content=”WordPress 6.x”. This is one of the first things theme detectors and bots check. Removing it is essential for keeping your CMS identity private.
Go to WP Ghost > Tweaks > Hide Options > Hide WordPress Generator META Tags.

Hide WordPress DNS Prefetch META Tags
WordPress adds a DNS prefetch link in your header that points to s.w.org (the WordPress CDN). This is another signal that theme detectors use to confirm your site runs WordPress. Removing it eliminates that detection vector.
Go to WP Ghost > Tweaks > Hide Options > Hide WordPress DNS Prefetch META Tags.

Hide HTML Comments
WordPress plugins and themes frequently insert HTML comments into your source code. These comments contain plugin names, version numbers, and other identifiable information. Theme detectors parse these comments to identify your technology stack.
Removing HTML comments is essential if you want to fully protect your site from detection. This option strips all HTML comments from your frontend output.
Go to WP Ghost > Tweaks > Hide Options > Hide HTML Comments.

Hide Emoji Icons
WordPress loads emoji icon scripts on every page by default. If you do not use emojis in your content, these scripts are unnecessary and they slow down your page load times. Disabling them also removes another WordPress-specific fingerprint from your source code.
Go to WP Ghost > Tweaks > Hide Options > Hide Emojicons.

Hide Source Map References
Minified CSS and JavaScript files often contain source map references at the bottom of the file (lines like sourceMappingURL=app.min.js.map). These references are invisible to visitors but fully visible in the page source and browser DevTools. They reveal internal file names, build structures, and project organization to anyone who looks.
Go to WP Ghost > Tweaks > Hide Options > Hide Source Map References and switch it on.

This strips all sourceMappingURL and sourceURL references from your frontend output. Enable this only on production sites. On development or staging sites, source maps are useful for debugging.
Disable Options
Disable Embed Scripts
WordPress loads oEmbed scripts to automatically convert pasted URLs (like YouTube links or tweets) into embedded content. Most modern themes already handle embeds natively, so loading these extra scripts is redundant. Disabling them improves page load speed and removes another WordPress-specific script from your source code.
Go to WP Ghost > Tweaks > Hide Options > Hide Embed Scripts.

Disable WLW Manifest Scripts
Windows Live Writer (WLW) is a discontinued desktop application. WordPress still adds a WLW manifest link to every page header by default. This link serves no purpose for most users and tells anyone checking your source code that your site runs WordPress.
Go to WP Ghost > Tweaks > Hide Options > Disable WLW Manifest Scripts.

Disable Right-Click, Inspect Element, View Source, Copy, and Drag
WP Ghost includes several options to prevent visitors from using browser tools to inspect your site’s source code or copy your content. These are found in WP Ghost > Tweaks > Disable Options.
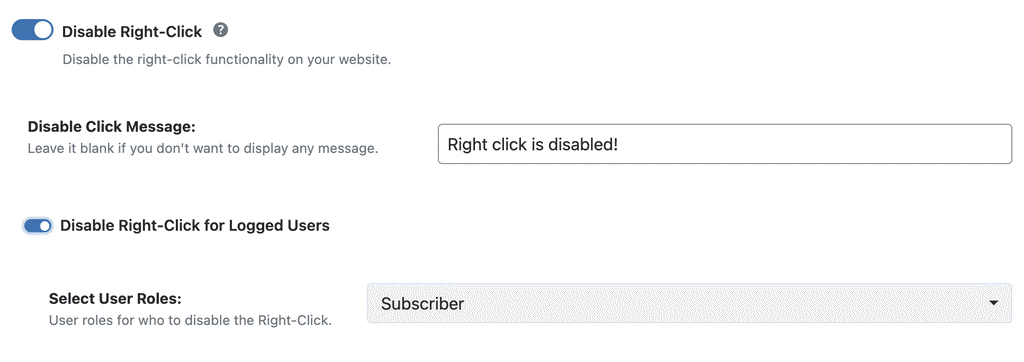
Disable Right-Click
Prevents visitors from opening the browser context menu. This blocks quick access to “Inspect Element” and other developer tools from the right-click menu.
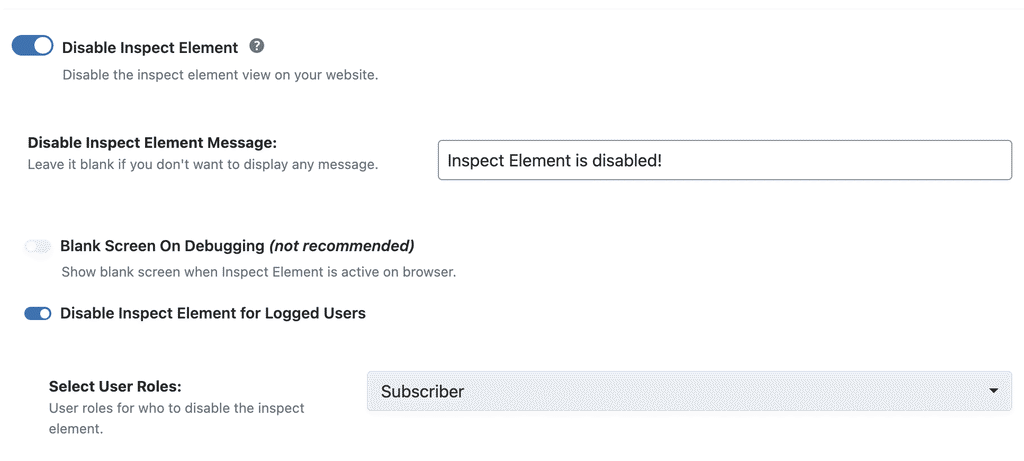
Disable Inspect Element
Blocks keyboard shortcuts that open browser developer tools, including Ctrl+Shift+I, Ctrl+Shift+C, Ctrl+Shift+K, Ctrl+Shift+J, F12, and Mac equivalents. This prevents visitors from easily accessing and analyzing your site’s code structure.
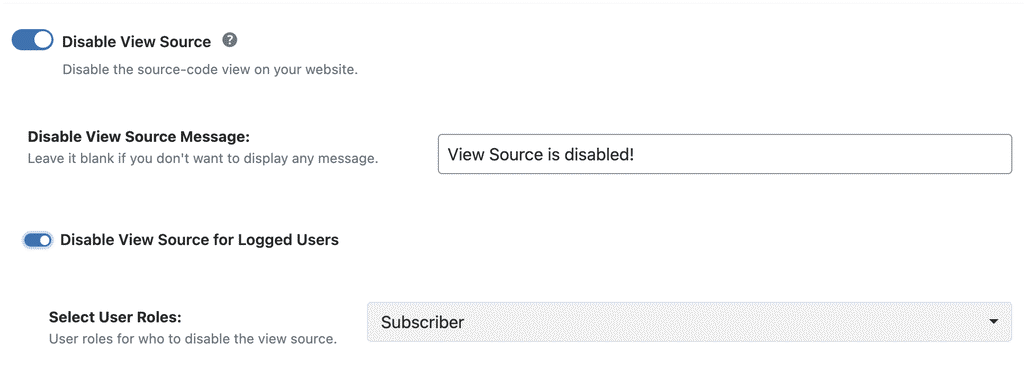
Disable View Source
Disables the keyboard shortcuts for viewing page source code (Ctrl+U on Windows, Option+Command+U on Mac). This prevents visitors from directly reading your HTML source.
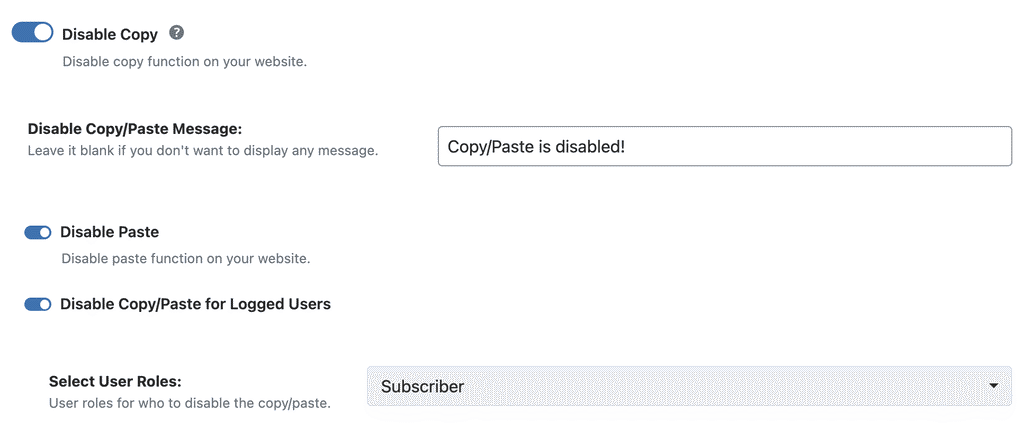
Disable Copy and Paste
Disable Copy prevents visitors from copying text content from your site. Disable Paste (a sub-option of Disable Copy) prevents visitors from pasting content into your website’s forms and fields. These features protect against content theft and automated form submissions.
Disable Drag/Drop Images
Prevents visitors from dragging and dropping images from your site to their desktop or other applications. This adds another layer of image protection.
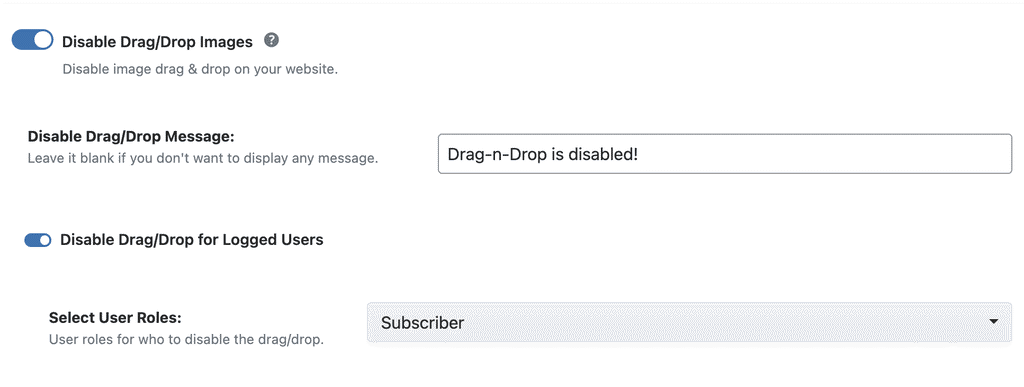
Each of these disable options lets you set a custom warning message that appears when a visitor tries the restricted action. Leave the message field blank if you prefer no message to appear. For the full guide, see the Customize Right Click Disable article.
Login Page Design
WP Ghost includes a built-in login page designer that lets you customize the appearance of your WordPress login page. You can replace the default WordPress logo with your own, set custom background colors or images, choose from 10 color schemes, and create a clean, branded login experience.
This is more than just a visual upgrade. The default WordPress login page is instantly recognizable. Customizing it removes that WordPress look and makes your site appear as a custom-built application, which is important for both CMS concealment and professional presentation to clients and team members.
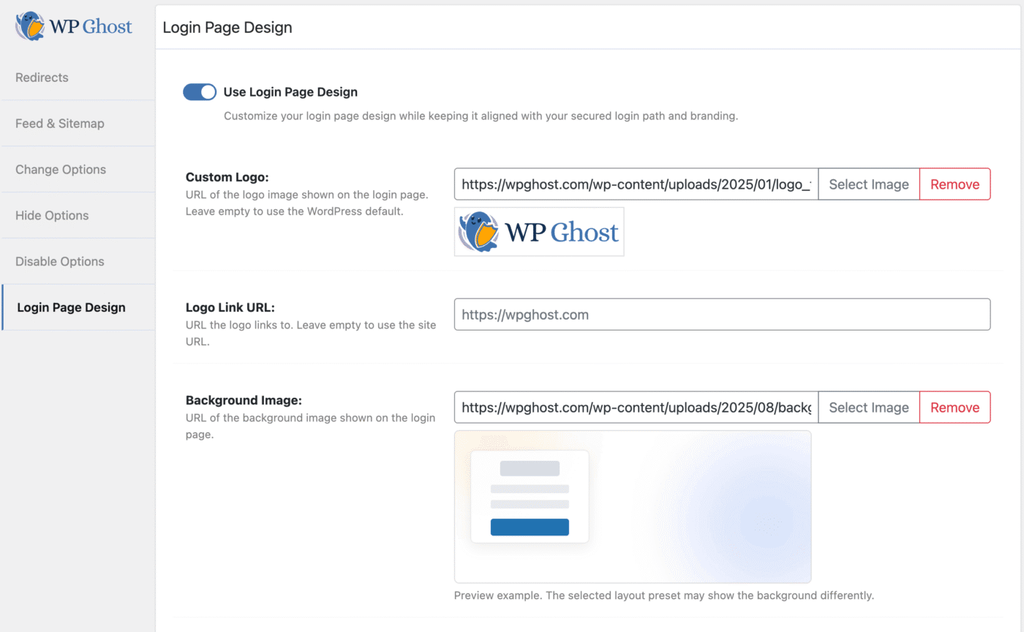
Go to WP Ghost > Tweaks > Login Page Design to enable the feature and customize your login page.
Related Tutorials
Continue strengthening your WordPress security with these guides:
Getting Started with WP Ghost – install, activate, and choose your security level.
Customize All WordPress Paths – change every WordPress path in the Change Paths panel.
Brute Force Attack Protection – protect login forms with reCAPTCHA and attempt limits.
URL Mapping and Text Mapping – change class names, IDs, and URLs in source code.
Firewall and Geo Security – configure the 8G Firewall, security headers, and country blocking.
Website Security Check – run a complete security audit with one-click fixes.
Hide From WordPress Theme Detectors – step-by-step guide to making your site invisible to BuiltWith, Wappalyzer, and others.
Hide WordPress Paths in CSS Files – change paths inside cached CSS files.
Remove Generator META in WordPress – detailed guide for removing all generator tags.
Remove DNS Prefetch in WordPress – remove s.w.org prefetch links.