URL Mapping and Text Mapping in WP Ghost – Complete Guide
This tutorial has moved to the new WP Ghost Knowledge Base where each feature is presented in detail.
Use URL Mapping, Text Mapping, and CDN Mapping in WP Ghost (formerly Hide My WP Ghost) to change stubborn URLs, rename CSS/JS class names, and secure CDN paths that standard path changes do not cover.
Activating Safe Mode or Ghost Mode in WP Ghost changes the most common WordPress paths automatically. But some URLs and class names survive that process. Plugins sometimes hardcode their own names into CSS files, JavaScript variables, or inline URLs that fall outside the standard path rewrite engine.
That is where the Mapping panel comes in. It gives you manual control over the remaining fingerprints in your source code, so you can eliminate every trace of WordPress, plugin names, and theme identifiers from your frontend output.
This tutorial covers every option in the WP Ghost > Mapping panel: URL Mapping, Text Mapping, CDN URLs, and the Experimental options for CSS/JS file mapping and optimization.
Why Mapping Matters for Security
Theme detectors do not rely on a single signal to identify your CMS. They cross-reference multiple data points: paths, class names, CSS file names, JavaScript variable names, and inline URLs. Even one leftover class name like “woocommerce-product-gallery” or a URL containing “/elementor/assets/” can confirm your technology stack.
According to Patchstack’s 2026 report, 91% of WordPress vulnerabilities are found in plugins. If a detector can identify which plugins you run by reading class names in your source code, it can match those plugins to known vulnerabilities. Mapping removes that reconnaissance data from your frontend.
Here is how mapping fits into your overall security strategy:
| Security layer | What it covers | WP Ghost feature |
|---|---|---|
| Path security | Default WordPress directory paths | Change Paths (Safe/Ghost Mode) |
| Fingerprint removal | Version tags, META tags, HTML comments | Tweaks > Hide Options |
| Source code mapping | Remaining URLs, class names, CDN paths | Mapping (this tutorial) |
| Firewall protection | Script injection, SQL injection, bot traffic | Firewall and Headers |
Mapping is the third layer. It catches everything that paths and tweaks do not cover.
URL Mapping
Some plugin URLs survive the automatic path changes because they are hardcoded into the plugin itself rather than following the standard WordPress URL structure. For example, a plugin might load a file from a path like /assets/f9f4ca341/main.css that does not follow the /wp-content/plugins/ pattern. These URLs reveal the plugin identity to anyone inspecting your source code.
URL Mapping lets you replace any internal URL in your frontend source code with a custom one. WP Ghost cannot change these automatically because they vary per plugin, but you can add them manually in seconds.
If the feature is not active, enable it from WP Ghost > Overview.
How to use URL Mapping
Go to WP Ghost > Mapping > URL Mapping.
- Open your site in a browser and view the page source (Ctrl+U or Cmd+Option+U).
- Search for any URL that still reveals a plugin name or WordPress path.
- Copy that URL and paste it in the URL field in the mapping table.
- Type your replacement URL in the New URL field.
- Click Add another URL to add more entries.
- Click Save to apply the changes.
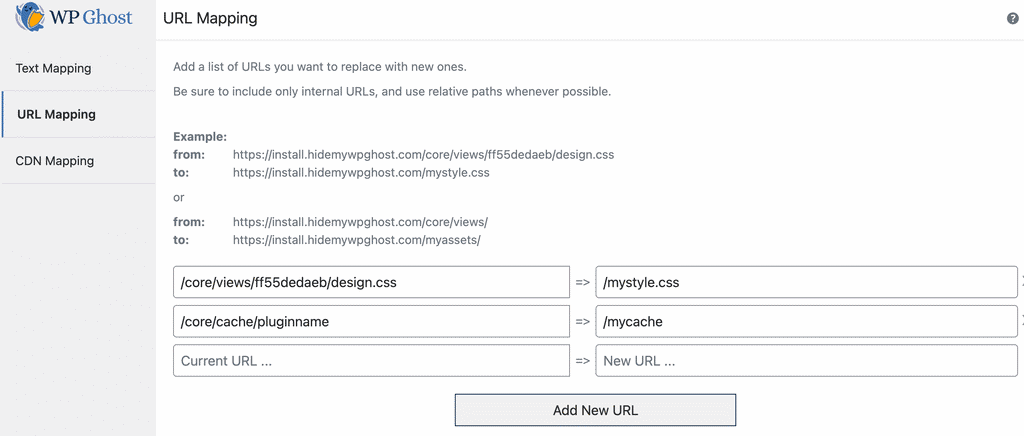
For example, you can change https://yourdomain.com/assets/f9f4ca341/main.css to https://yourdomain.com/mystyle.css. Keep the original file extension in the new URL (.css stays .css, .js stays .js) as a best practice.
Only add URLs from your frontend source code after activating Safe Mode or Ghost Mode. This way, you are only mapping URLs that the automatic path changes did not already cover.
For a detailed walkthrough with examples, see the How to Use URL Mapping article.
Text Mapping
WordPress uses identifiable class names throughout its source code. Classes like wp-custom, wp-image, wp-block, and wp-caption immediately tell theme detectors that your site runs WordPress. Some plugins like WooCommerce and Elementor also inject their own class names that reveal their presence.
Text Mapping lets you replace any class name, ID, or text string in your frontend source code with a custom value.
If the feature is not active, enable it from WP Ghost > Overview.
How to use Text Mapping
Go to WP Ghost > Mapping > Text Mapping.
- Type the class name you want to change in the left field of the Text Mapping table.
- Type your replacement name in the right field.
- Click Save to apply.
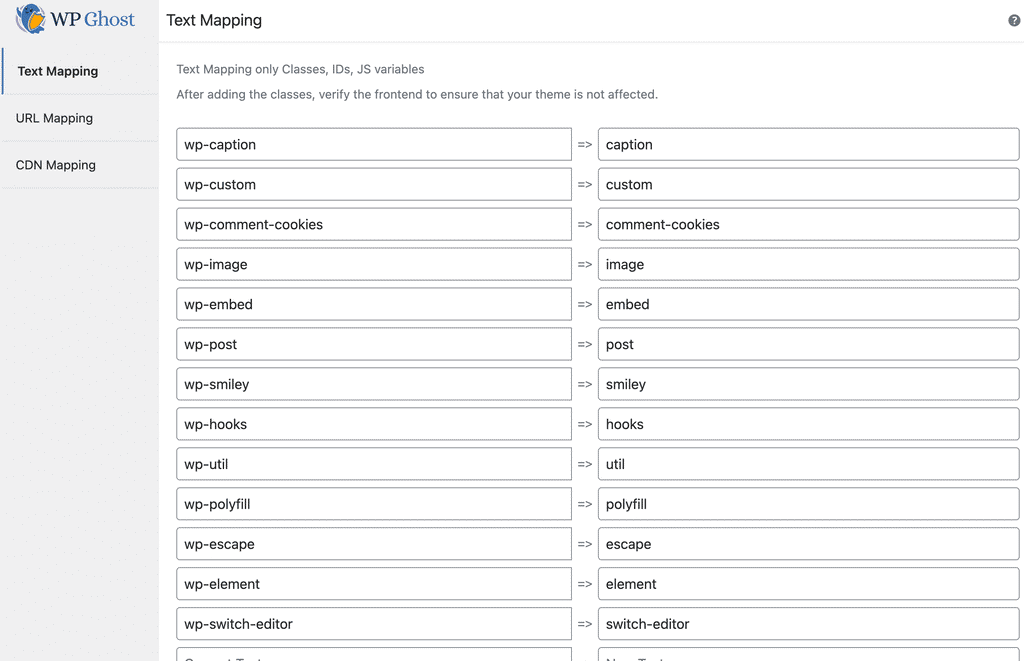
Predefined WordPress Classes
WP Ghost provides a list of common WordPress class names that you can add to Text Mapping with a single click. These include classes like wp-caption, wp-custom, wp-block, wp-image, wp-smiley, wp-embed, wp-i18n, wp-hooks, wp-util, wp-polyfill, wp-escape, wp-element, wp-post, and wp-switch-editor.
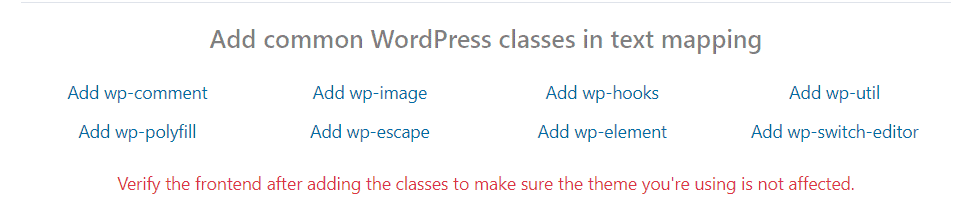
Click any class from the list to add it. Classes you have already added appear in a slightly different shade so you can track which ones are active. Always check your frontend after adding classes to make sure your theme still displays correctly.
Special Patterns: {blank} and {rand}
WP Ghost supports two special patterns for advanced mapping:
Use {blank} as the replacement to completely remove a class name without replacing it. The class attribute stays but the name disappears. Example: class_name => {blank}
Use {rand} as the replacement to assign a random name that changes on every page load. This makes it impossible for detectors to match a consistent pattern. Example: class_name => {rand}
For the full guide with detailed examples, see the Advanced Text Mapping article and the Hide Gutenberg Classes article.
Text Mapping only Classes, IDs, JS Variables
By default, Text Mapping replaces text everywhere in your source code, including URLs. This can sometimes cause issues when a class name also appears inside a URL. When you enable this option, WP Ghost limits text mapping to classes, styles, IDs, and scripts only, preventing accidental changes to URLs and other functional elements.
Go to WP Ghost > Mapping > Text Mapping > Text Mapping only Classes, IDs, JS variables.

We recommend keeping this option enabled, especially when changing classes from popular plugins like WooCommerce or Elementor. It prevents mapping from breaking functional URLs while still renaming all visible class names and JavaScript variables.
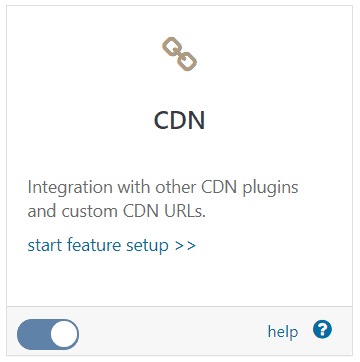
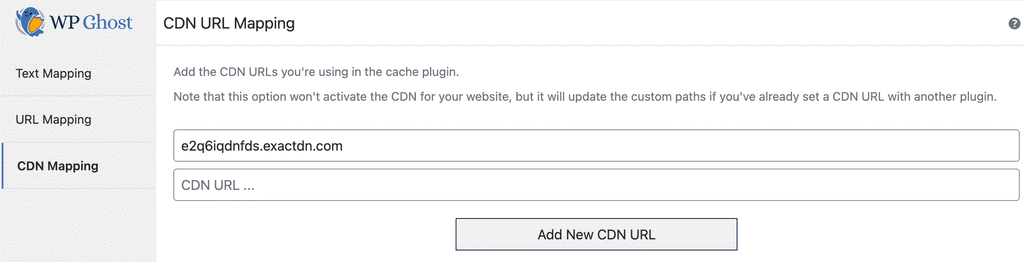
CDN URLs
If you use a Content Delivery Network (CDN) to serve your site’s static files, the CDN domain may still load files using the original WordPress paths. This means a visitor could see URLs like cdn.yourdomain.com/wp-content/themes/ in their browser, even after you changed all paths on your main domain.
WP Ghost integrates with the most popular CDN plugins automatically. But if you use a CDN that WP Ghost has not tested yet, or if paths are not changing on the CDN domain, you can add the CDN domain manually.
If the feature is not active, enable it from WP Ghost > Overview.
Go to WP Ghost > Mapping > CDN URLs and add your CDN domain in the table.
For CDN compatibility details, see the CDN Enabler Compatibility article.
Experimental Options
The Experimental section contains advanced features that go beyond standard source code mapping. These options are powerful but may impact performance or compatibility on some server configurations.
Go to WP Ghost > Mapping > Experimental.
Text Mapping in CSS and JS Files Including Caches
Standard Text Mapping only changes class names in the HTML output of your pages. But class names also appear inside CSS and JavaScript files themselves. If a detector reads your theme.css file directly, it can still find WordPress-specific class names even after you mapped them in the HTML.
This option extends Text Mapping into CSS and JS files, including cached versions. It works especially well when combined with the Text Mapping only Classes, IDs, JS variables option enabled.
Go to WP Ghost > Mapping > Experimental > Text Mapping in CSS and JS files including caches.

Be aware that this option may slow down loading speed slightly because CSS and JS files are loaded dynamically through WordPress redirects instead of being served as static files. This is the tradeoff for deeper class name replacement.
For the full guide, see the Hide WordPress Paths in CSS Files article.
Optimize CSS and JS Files
If you do not use a dedicated cache plugin, this option adds server-level optimization rules for your static files. WP Ghost writes rules to your server config file that enable GZIP compression, set expiration headers, and add output filtering for CSS, JS, and image files.
The optimization rules include DEFLATE compression for CSS and JavaScript files, expiration headers set to one month, and the Vary: Accept-Encoding header for proper CDN handling.
Go to WP Ghost > Mapping > Experimental > Optimize CSS and JS files.

If you already use a cache plugin like WP Rocket, W3 Total Cache, or LiteSpeed Cache, you do not need this option. Your cache plugin already handles these optimizations. This feature is designed for sites without a cache plugin.
To test your site speed after enabling this option, use tools like GTmetrix, Pingdom, or Google PageSpeed Insights.
Related Tutorials
Continue securing your WordPress site with these related guides:
Getting Started with WP Ghost – install, activate, and choose your security level.
Customize All WordPress Paths – change every WordPress path in the Change Paths panel.
Activate Security Tweaks – remove WordPress fingerprints, version tags, and HTML comments.
Hide From WordPress Theme Detectors – complete step-by-step guide to full CMS anonymity.
Hide Gutenberg Classes – remove wp-block and other block editor classes.
Hide WordPress Paths in CSS Files – change paths inside cached CSS and JS files.
Hide Plugins Like WooCommerce and Elementor – rename popular plugin identifiers.
WP Ghost and CDN Enabler – configure CDN path mapping.
Website Security Check – verify all your settings with a full security audit.