WP Ghost Security Monitor – Weekly Cloud Scanning for WordPress
This tutorial has moved to the new WP Ghost Knowledge Base where each feature is presented in detail.
- What Is the Security Monitor?
- Why Use the Security Monitor
- How to Set Up the Security Monitor
- Reading the Security Report
- Report Warnings and How to Fix Them
- “A path is visible. Brute Force attack is imminent!”
- “WordPress XML-RPC Brute Force exploit detected!”
- “WordPress path is still accessible!”
- “WordPress readme.html is accessible!”
- “WordPress old paths are visible in the source code!”
- “WordPress Prefetch https://s.w.org is visible!”
- “WordPress https://api.w.org/ is visible!”
- “WordPress ‘Powered by WordPress’ is visible!”
- Email Notifications
- Frequently Asked Questions
- Related Tutorials
Automatically scan your WordPress sites every week from the cloud with WP Ghost’s (formerly Hide My WP Ghost) Security Monitor. Get emailed when security issues are found. The Security Monitor runs in your WP Ghost Dashboard account. This is a Premium feature.
The in-WordPress Security Check requires you to log in and click Start Scan. The Security Monitor runs automatically every week from outside your server, seeing exactly what bots see. If your login path is exposed, the Monitor finds it the same way an attacker would. If something breaks after a plugin update or hosting change, you know within a week instead of finding out when the site is already compromised.
According to Patchstack’s 2026 report, attackers weaponize newly disclosed vulnerabilities within a median of just 5 hours. Continuous external monitoring closes the gap between when a vulnerability appears and when you discover it.
This tutorial covers the full Security Monitor: setup, reading reports, understanding every warning, email notifications, and how to fix each issue.
What Is the Security Monitor?
The Security Monitor is WP Ghost’s cloud-based scanning feature. It supplements the in-WordPress Security Check by running automated weekly scans from outside your server. This external perspective catches issues that internal scans might miss, like login paths that are accessible from the public internet even if they appear hidden from within the dashboard.
Reports are stored in your WP Ghost Dashboard and optionally emailed to you.
Why Use the Security Monitor
| Without Security Monitor | With WP Ghost Security Monitor |
|---|---|
| You must remember to run manual scans | Automated weekly scans run without any action |
| Internal scans only see what WordPress sees | External scans see exactly what bots see |
| No alerts when something breaks | Email reports notify you of new issues |
| No proof for hosting providers | Export reports for compliance and incident response |
| One site at a time | Monitor all connected sites from one dashboard |
How to Set Up the Security Monitor
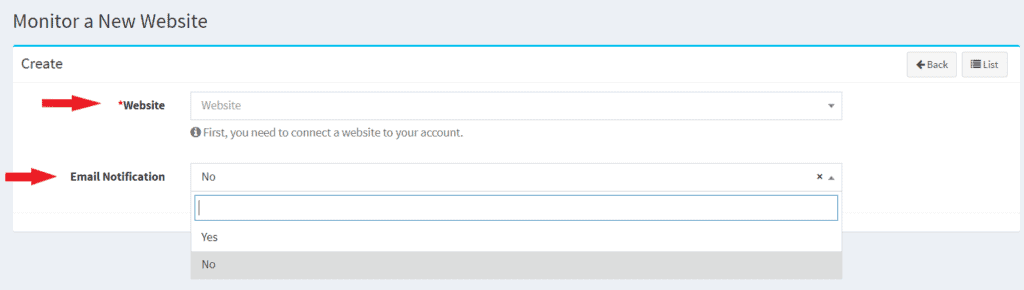
Log in to your WP Ghost Dashboard. Go to Security Monitor. Click +New. Select the website you want to monitor (only sites connected to your account via the WP Ghost plugin appear here). Enable or disable Email Notification for weekly reports. Click Submit.
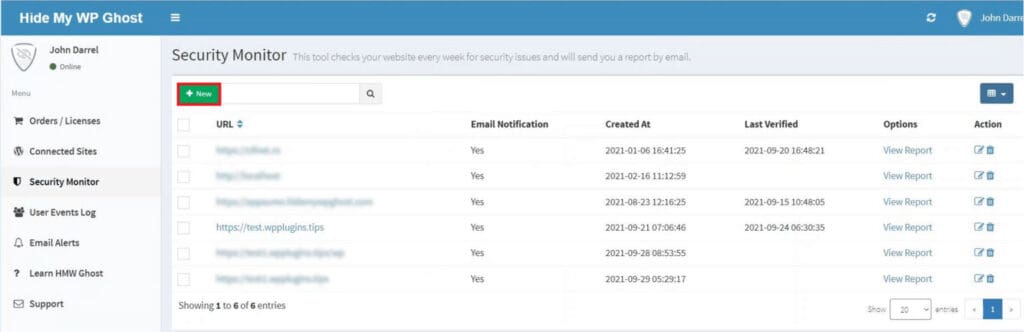
The Security Monitor list shows all monitored sites with their URL, email notification status, date added (Created At), and last verification date. To remove a website from monitoring, click the Trash icon next to it.

Reading the Security Report
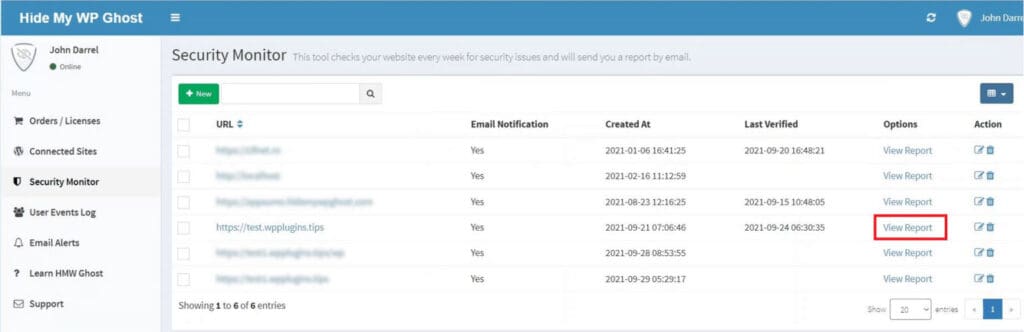
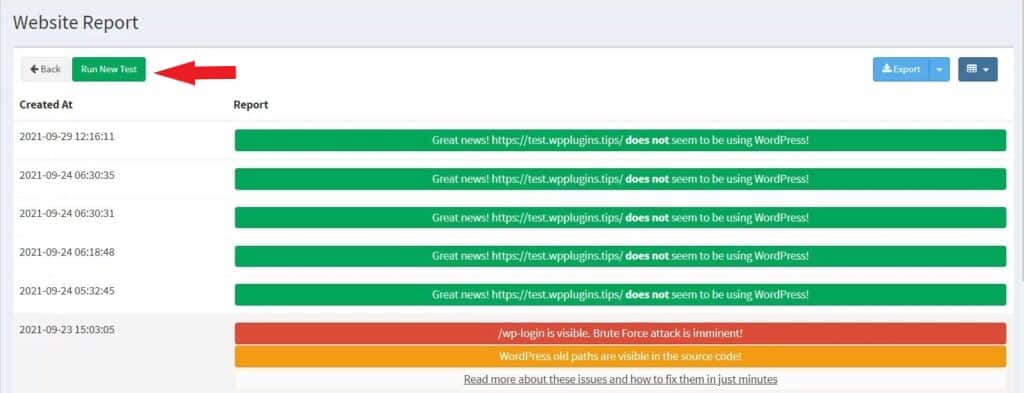
View a report by clicking View Report next to any monitored site. If no report exists yet, click Run New Test to generate one on demand.
Reports use two severity levels. Blue notifications are informational insights. They do not necessarily require action but show what the scanner detected (e.g., WordPress identity markers visible in source code). Red notifications are critical issues that need to be fixed. They represent active vulnerabilities that expose your site to attack (e.g., login path accessible, XML-RPC enabled).
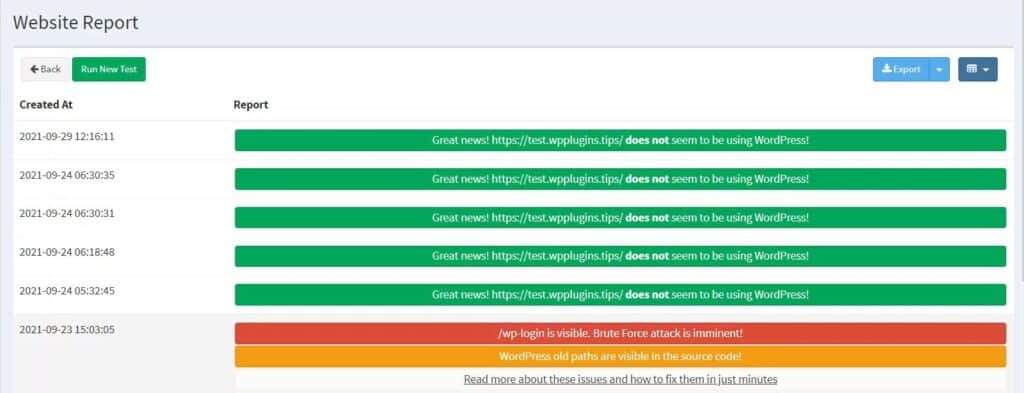
You can re-run the scan at any time by clicking Run New Test. Use the Export button to download a copy of the report.

Report Warnings and How to Fix Them
Here are the warnings the Security Monitor can generate, what each means, and how to fix them.
“A path is visible. Brute Force attack is imminent!”
The default wp-login.php or wp-admin path is accessible from the public internet. Bots can find and attack it. Fix: change and hide the login path in WP Ghost. Also activate Brute Force Protection with reCAPTCHA.
“WordPress XML-RPC Brute Force exploit detected!”
XML-RPC sends credentials in plaintext with every request and is no longer needed (WordPress uses the REST API). Fix: disable XML-RPC in WP Ghost > Change Paths > API Security, or restrict access via .htaccess.
“WordPress path is still accessible!”
The original wp-content/plugins and wp-content/themes paths still respond to requests. Bots target these to exploit vulnerable plugins. Fix: change and hide WordPress paths in WP Ghost. Make sure to change the paths first, then enable Hide WordPress Common Paths in WP Core Security.
“WordPress readme.html is accessible!”
Root files like readme.html, license.txt, and wp-config.php contain WordPress version info, database details, and server paths. These are often the first files bots check. Fix: enable Hide WordPress Common Files in WP Ghost > Change Paths > WP Core Security.
“WordPress old paths are visible in the source code!”
wp-content/plugins, wp-content/themes, /wp-admin, and other default paths are visible in your HTML source. Bots crawl source code to identify WordPress sites and target known plugin paths. Fix: customize all paths and enable source code path replacement. Use Text Mapping and URL Mapping for any remaining fingerprints.
“WordPress Prefetch https://s.w.org is visible!”
The DNS prefetch meta tag for WordPress emojis identifies your CMS to scanners. Fix: enable Hide WordPress DNS Prefetch META Tags in WP Ghost > Tweaks > Hide Options.
“WordPress https://api.w.org/ is visible!”
The REST API discovery link in the page header identifies your site as WordPress. Not needed in production source code. Fix: enable Hide WordPress Generator META Tags in WP Ghost > Tweaks > Hide Options.
“WordPress ‘Powered by WordPress’ is visible!”
The footer text identifies your CMS to any visitor or bot. Fix: remove it via your theme’s customizer (Appearance > Customize) or theme settings. Also change the default tagline (“Just another WordPress site”) in Settings > General, as it is another direct WordPress identifier.
Email Notifications
Default notification email: Go to Profile > Settings in the WP Ghost Dashboard. Set the Default Notification Email address. This is where all Security Monitor reports and User Events email alerts are sent.

Per-site email: To send reports for specific sites to different email addresses, go to Connected Sites. Click the edit icon in the Alert Email column for the target site. Enter the custom email and click Submit. Per-site settings override the default notification email.
If no email is configured anywhere, neither in Profile Settings nor Connected Sites, reports are sent to the email address connected to your WP Ghost account.
Frequently Asked Questions
What is the difference between Security Monitor and Security Check?
The Security Check runs inside your WordPress dashboard when you click Start Scan. It checks 39+ server and WordPress configuration items. The Security Monitor runs automatically every week from the WP Ghost Cloud, scanning your site externally to check for exposed paths, accessible files, and visible WordPress markers. Use both: the Security Check for deep internal configuration, the Security Monitor for continuous external validation.
Is this a Premium feature?
Yes. The Security Monitor requires a WP Ghost Premium account and a connected site. The in-WordPress Security Check is available in the free version.
How often does it scan?
Automatically every week. You can also run a manual scan at any time by clicking Run New Test in the Security Monitor panel.
Does WP Ghost modify WordPress core files?
No. The Security Monitor scans your site from outside. It reads publicly accessible responses. It does not modify any files, install anything, or require additional server-side configuration beyond the standard WP Ghost plugin connection.
Related Tutorials
Fix issues found by the Security Monitor:
Website Security Check – the in-WordPress scanner with 39+ security tasks (complements the cloud-based Monitor).
Customize All WordPress Paths – fix exposed path warnings.
Brute Force Attack Protection – add reCAPTCHA to login forms.
Activate Security Tweaks – remove DNS prefetch, generator META, and other WordPress fingerprints.
User Events Log – track dashboard activity and set up email alerts (uses the same notification email system).
Security Threats Log – monitor blocked attacks and firewall activity.