Hide My WP Ghost and CDN Enabler
May 13, 2017
This tutorial has moved to the new WP Ghost Knowledge Base where each feature is presented in detail.
WP Ghost (formerly Hide My WP Ghost) is compatible with CDN Enabler. WP Ghost automatically detects the CDN domain configured in CDN Enabler. The only setup needed is setting WP Ghost’s Plugin Loading Hook to Late Loading so WP Ghost processes paths after CDN Enabler has rewritten the asset URLs.
Why CDN Enabler Needs This Configuration
CDN Enabler rewrites local asset URLs to point to your CDN domain. WP Ghost rewrites WordPress paths to custom paths. Both plugins modify the HTML output, and the order matters. If WP Ghost runs before CDN Enabler, WP Ghost’s custom paths may not be applied to CDN-served URLs. Late Loading ensures WP Ghost processes the HTML last, after CDN Enabler has already rewritten the asset URLs.
How to Configure WP Ghost with CDN Enabler
Set WP Ghost to Late Loading
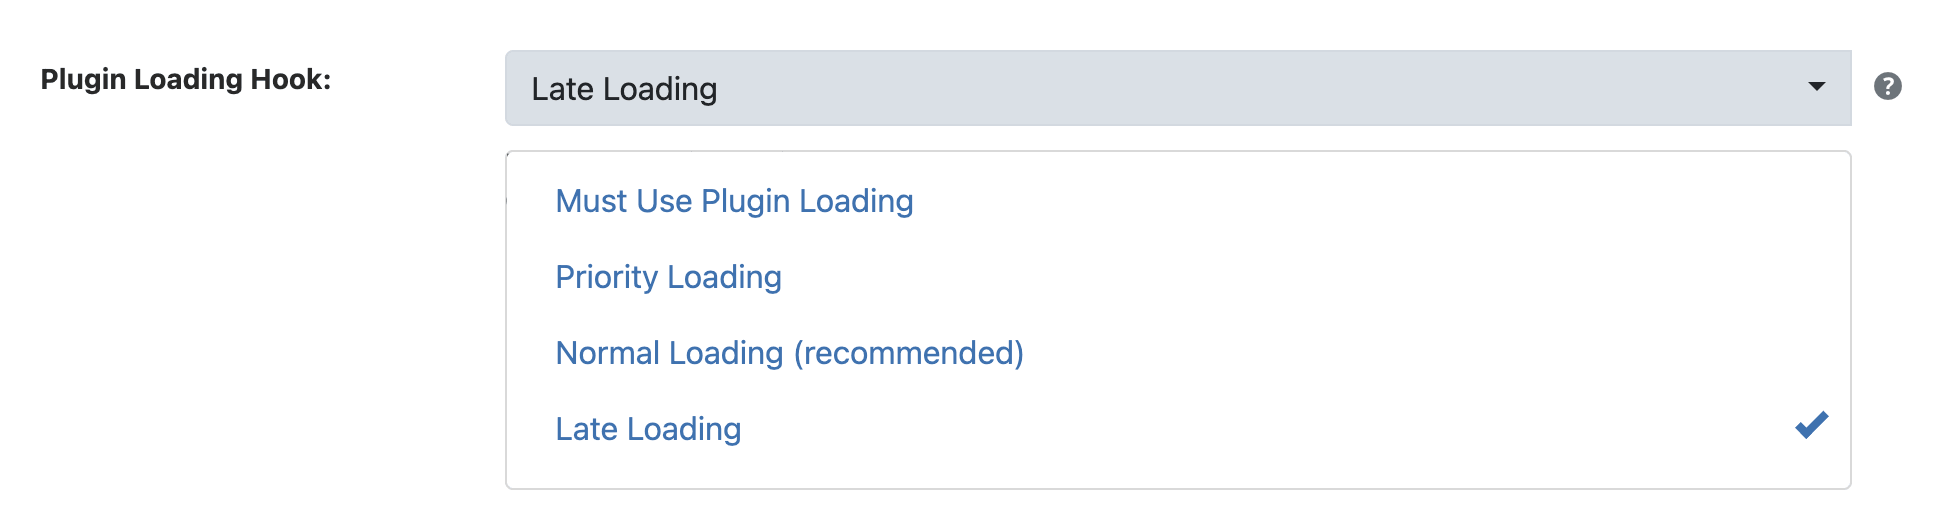
Go to WP Ghost > Advanced > Compatibility > Plugin Loading Hook. Select Late Loading. Click Save. Clear any page cache and test your frontend.
WP Ghost automatically detects the CDN domain configured in CDN Enabler and adds it to the CDN URLs list at WP Ghost > Mapping > CDN URLs. You do not need to add the CDN domain manually or change the CDN Enabler included directories.
Verify the Setup
Visit your site in an incognito browser window. View page source. Check that asset URLs point to your CDN domain (confirming CDN Enabler is working) and that those CDN URLs use your custom WP Ghost paths (not /wp-content/plugins/ or /wp-content/themes/). Search the page source for “wp-content” – it should not appear anywhere, including in CDN URLs.
Troubleshooting
CDN URLs still show wp-content/plugins paths. WP Ghost is not loading late enough. Confirm Plugin Loading Hook is set to Late Loading at WP Ghost > Advanced > Compatibility. Clear your cache after changing. If the issue persists, check that WP Ghost detected the CDN domain at WP Ghost > Mapping > CDN URLs. If not detected, add it manually.
Assets not loading or broken styling. If assets fail after enabling Late Loading, try switching to Priority Loading instead to test if the issue is loading-order related. If Priority Loading works but Late Loading does not, another plugin may be conflicting with the late HTML processing.
CDN domain not detected. Re-save WP Ghost settings to trigger automatic CDN detection. If still not detected, add the domain manually in WP Ghost > Mapping > CDN URLs.
Frequently Asked Questions
Does this work with BunnyCDN specifically?
Yes. CDN Enabler is commonly used with BunnyCDN, and WP Ghost works with this combination. The same Late Loading configuration applies regardless of which CDN provider you use (BunnyCDN, KeyCDN, StackPath, or any other CDN).
Do I still need to add custom paths to CDN Enabler’s Included Directories?
No. With Late Loading, WP Ghost processes paths after CDN Enabler. WP Ghost automatically detects the CDN domain. You do not need to modify CDN Enabler’s Included Directories setting.
Do I need to purge the CDN cache after changing WP Ghost paths?
Yes. After changing any path in WP Ghost, purge your CDN cache so edge servers fetch fresh copies with the updated paths. Purge from your CDN provider’s dashboard.
What if I use a CDN through WP Rocket or LiteSpeed Cache instead?
If your CDN is managed by a different cache plugin, follow that plugin’s compatibility guide instead. CDN Enabler is a standalone CDN rewrite plugin and needs Late Loading specifically because it modifies HTML output independently. See the Compatibility Plugins List for other CDN/cache plugin guides.
Does WP Ghost modify WordPress core files?
No. WP Ghost uses rewrite rules and WordPress hooks. No core files modified.
Related Tutorials
CDN URL Mapping – extend WP Ghost path changes to any CDN domain.
Hide Paths in CSS Files – Change Paths in Cached Files for cache plugin output.
Compatibility Plugins List – all tested CDN and cache plugins.
Customize All WordPress Paths – configure paths before setting up CDN integration.
Website Security Check – verify your configuration after setup.