How to Activate WordPress Debugging
June 17, 2024
- Step 1: Access Your wp-config.php File
- Step 2: Edit the wp-config.php File
- Explanation of the Code
- Step 3: Save and Upload the File
- Step 4: Review the Debug Log
Debugging is an essential process for identifying and fixing issues in WordPress. Activating debugging mode in WordPress provides detailed error messages and logs that can help diagnose problems. Here’s a step-by-step guide on how to enable debugging in WordPress:
Step 1: Access Your wp-config.php File
The wp-config.php file is located in the root directory of your WordPress installation. This file contains configuration settings for your WordPress site.
- Connect to Your Server: Use an FTP client or your web hosting file manager to access your WordPress files.
- Locate the wp-config.php File: Navigate to the root directory of your WordPress installation, where the
wp-config.phpfile is located.
Step 2: Edit the wp-config.php File
To activate debugging, you need to edit the wp-config.php file and add or modify certain lines of code.
- Open the wp-config.php File: Open the file in a text editor.
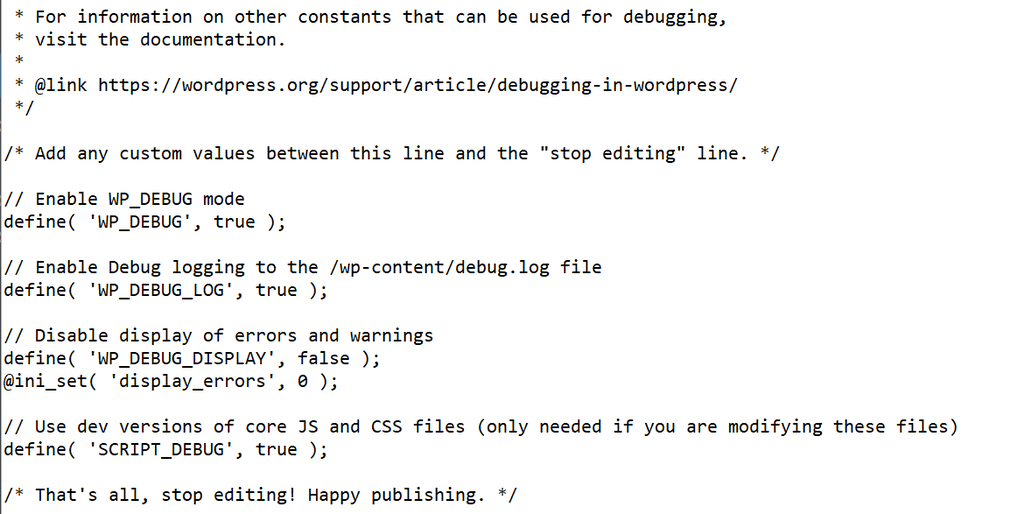
- Add Debugging Code: Look for the line that says
/* That's all, stop editing! Happy blogging. */. Just above this line, add or modify the following lines of code:
// Enable WP_DEBUG mode
define( 'WP_DEBUG', true );

// Enable Debug logging to the /wp-content/debug.log file
define( 'WP_DEBUG_LOG', true );

// Disable display of errors and warnings
define( 'WP_DEBUG_DISPLAY', false );
@ini_set( 'display_errors', 0 );

// Use dev versions of core JS and CSS files (only needed if you are modifying these files)
define( 'SCRIPT_DEBUG', true );
Explanation of the Code
- WP_DEBUG: This constant enables the debugging mode. Setting it to
trueactivates debugging throughout your WordPress site. - WP_DEBUG_LOG: This constant allows logging of errors to a debug.log file within the
wp-contentdirectory. This is useful for reviewing errors at a later time. - WP_DEBUG_DISPLAY: By default, debugging information is displayed within the HTML of your pages. Setting this to
falseprevents this information from being shown on your site. The@ini_setline further ensures that errors are not displayed. - SCRIPT_DEBUG: This constant forces WordPress to use the non-minified versions of core JavaScript and CSS files. This is helpful if you are making changes to these files.
Step 3: Save and Upload the File
After adding the debugging code, save the wp-config.php file and upload it back to your server if you edited it locally.
Step 4: Review the Debug Log
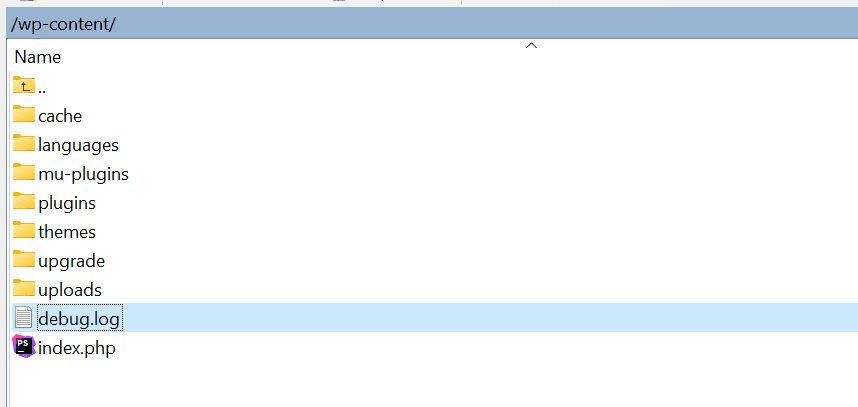
When WP_DEBUG and WP_DEBUG_LOG are enabled, WordPress will log errors and warnings to a file named debug.log located in the wp-content directory. You can access and review this file to understand what issues are occurring on your site.
- Navigate to wp-content: Go to the
wp-contentdirectory in your WordPress installation. - Open debug.log: Open the
debug.logfile to see the list of errors and warnings logged by WordPress.
Activating WordPress debugging is a straightforward process that involves editing the wp-config.php file and adding specific constants. This enables detailed logging of errors, which is crucial for troubleshooting and resolving issues on your WordPress site. Remember to disable debugging mode once you have finished troubleshooting to prevent potential security risks.
